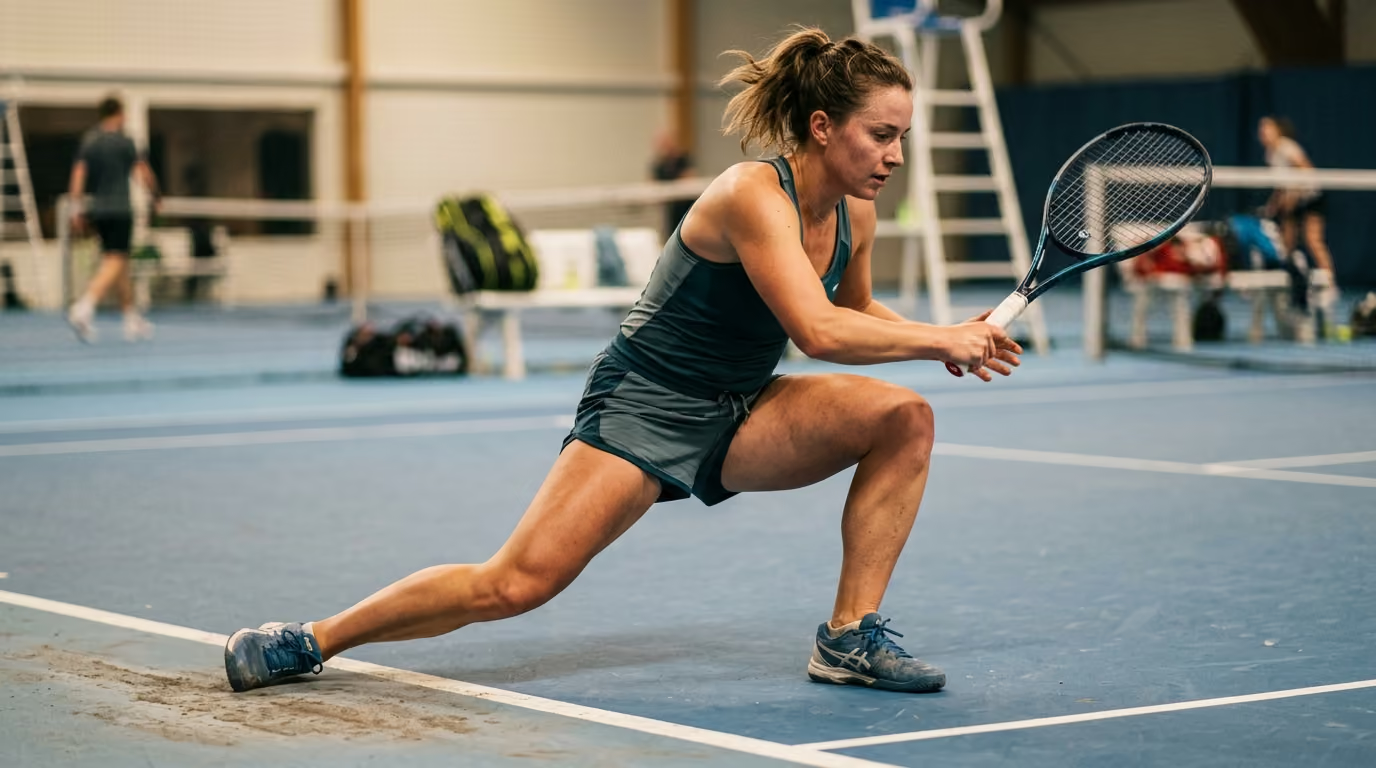

Deceleration training is crucial for racquet sports athletes to safely brake, lunge, and change direction, protecting joints and improving on-court transitions.




You sprint toward the sideline to chase down a deep volley. Your opponent placed it beautifully, forcing you to stretch your boundaries. You reach the ball, hit a weak slice, and try to change direction. Instead of a smooth transition, your lead foot slips, your knee shears inward, and you take two extra stumbling steps to recover. By the time you regain your balance, the point is already over. This is not an acceleration problem; it is a breakdown in your ability to brake.
To play racquet sports safely and efficiently, you must train deceleration as a specific physical quality. Effective braking involves absorbing your momentum through coordinated joint flexion and eccentric muscle strength. By developing this capacity, you can protect your joints and transition smoothly into your next shot.
When we analyze movement on court, we often focus on how fast a player runs. We look at quick first steps and explosive sprints. However, the ability to stop and change direction is often the true differentiator between amateur and advanced performance. This comprehensive guide outlines the physics of braking, sport-specific movement demands, gym-based exercises, and court-based progressions to help you move with control and longevity.
For many years, coaches treated deceleration as simply the opposite of acceleration. We now know that stopping is a distinct physical quality with its own unique mechanical demands. While acceleration relies on concentric muscle actions to produce velocity, deceleration requires eccentric muscle actions to reduce momentum.
High-intensity deceleration is defined in sports science research as acceleration below −2.5 meters per second squared. However, sports scientists warn against using a single universal threshold for all players. Every athlete has a unique physical profile and different movement limits.
On the court, braking is never an isolated action. It is a highly coordinated skill that integrates several systems. To understand this skill, we use an organizing principle: perceive, prepare, brake, stabilize, redirect, and reaccelerate.
This sequence shows that the physical process of stopping begins before your foot hits the floor. It starts with your visual system and your brain. If you cannot anticipate where the ball is going, you cannot prepare your body to absorb the impact.
You should never train yourself to move faster than you can safely slow down. Developing speed without braking capacity is like installing a high-performance engine in a car with worn-out brakes. To build a resilient body, you must prioritize injury prevention on the court by balancing acceleration with structured deceleration training.
To understand deceleration, we must look at the physics of movement. Stopping requires a braking impulse, which is the product of force and time. This impulse must be directed in the opposite direction of your current momentum.
You can reduce your velocity on the court in four distinct ways. You can produce more force against the ground. You can apply that force over a longer duration of time. You can start the braking process earlier. Finally, you can use multiple foot contacts instead of trying to stop in one sudden step.
Research shows that the penultimate and antepenultimate foot contacts contribute significantly to braking. The penultimate contact is the second-to-last step before you change direction. The antepenultimate contact is the third-to-last step.
When you use these preparatory steps, you distribute the mechanical load across multiple joints. This strategy reduces the sheer force placed on your final foot plant. An athlete who waits until the last second to brake must absorb all their momentum in one violent step. This sudden force increases the stress on the knee joint and increases the risk of acute tissue strain.
Stopping distance is highly dependent on your approach velocity, your body position, and court friction. Faster approach speeds and sharper turn angles increase the mechanical demand on your lower limbs. To progress safely, players must learn to control their center of mass.
Lowering your center of mass requires coordinated flexion of your ankles, knees, and hips. The National Strength and Conditioning Association describes this as force absorption under high eccentric loading. A lower center of mass keeps your base of support stable and prepares your muscles to redirect your weight.
Deceleration puts tremendous stress on the muscles, tendons, and joints of the lower body. During rapid braking, your joints experience incredibly high angular velocities. Research has measured angular velocities of approximately 367 degrees per second at the ankle. At the knee, velocities can reach 493 degrees per second during fast deceleration.
To absorb these forces, your quadriceps must work eccentrically. This means the muscle is producing force while it is being stretched. Peak activation of the quadriceps during the mid-eccentric phase of a foot strike can reach 161 percent of a maximal voluntary contraction.
Your hamstrings also play a vital role during deceleration. They co-contract alongside the quadriceps to control tibial motion and support knee stability. This co-contraction prevents the shin bone from sliding too far forward under load.
Safe movement also requires active trunk control. Your core muscles must stabilize your upper body as you decelerate. If you suffer from excessive lateral trunk flexion, your body weight will spill over your lead foot. This poor positioning increases knee loading and makes it harder to recover.
By understanding these anatomical demands, you can train your body to distribute forces evenly. This structural balance is essential for maintaining long-term player health as you face the physical demands of competitive play.
While the physics of braking remain constant, the specific demands vary across different racquet sports. Each game features unique court dimensions, ball speeds, and movement patterns.
A 2024 analysis of Australian Open singles matches analyzed tracking data across 182 matches. The researchers identified over 120,000 medium- and high-intensity changes of direction. This study showed that players executed an average of 1.6 changes of direction per point.
The data revealed that players covered about 4.8 meters per change of direction. These changes occurred approximately every 2.7 seconds in men's matches and every 3.1 seconds in women's matches. Interestingly, medium-intensity movements made up 88 to 94 percent of these changes.
This finding suggests that tennis movement training should not focus solely on maximum-speed sprints. Instead, you must practice frequent, controlled, moderate-intensity stops. Furthermore, two-thirds of the recorded directional changes involved angles greater than 105 degrees.
In contrast, pickleball is played on a much smaller court. The movements are shorter and require extremely rapid reaction times. Players frequently transition from the baseline to the non-volley zone line.
This transition requires you to sprint forward and then brake abruptly just behind the kitchen line. If you cannot stop your forward momentum, you will step into the kitchen or hit a high, vulnerable ball. Therefore, pickleball footwork drills must emphasize short, chopping steps to control your momentum.
Padel presents a third movement profile, combining court agility with glass wall interactions. Players must run backward to chase lobbed balls, turn, brake, and then move forward.
The glass walls require players to read the ball rebound while adjusting their footwork. You must maintain lateral stability on a synthetic turf surface that often contains loose sand. To move well, padel footwork training must focus on low, wide stances that allow you to absorb force and change directions on slippery surfaces.
The forward lunge is another critical braking action used in badminton, squash, and tennis. Many players view the lunge as merely a way to reach a low ball. In reality, a lunge is a high-force braking maneuver.
A musculoskeletal study of 15 badminton players compared forehand and backhand forward lunges. The researchers found that forehand lunges produced higher ankle contact forces. They also resulted in faster touchdown hip abduction and greater horizontal deceleration of the torso.
However, the difference in joint loading between the two directions was below 5 percent. This indicates that both sides require a high degree of physical preparation. Another study compared professional and amateur players during lunges.
Amateurs showed greater ankle range of motion and larger frontal-plane ankle inversion moments. Professionals, on the other hand, showed greater knee moments in both the sagittal and frontal planes. This does not mean the professional technique is inherently dangerous.
Professionals can tolerate these higher knee forces because they have greater lower-limb strength and better coordination. They have spent years building the specific tissue tolerance needed for deep lunges. Amateurs must focus on developing similar structural integrity before trying to copy professional movement speeds.
To build a body that can withstand the demands of braking, you must spend time in the gym. Your program should focus on developing eccentric strength, reactive power, and multi-directional stability.
Before attempting high-intensity plyometrics, you must build a solid foundation of lower-body strength. This general preparation increases the load-bearing capacity of your muscles and tendons.
You can learn more about structured gym programming in our strength & conditioning resources. The goal of this phase is to build general muscle mass and joint tolerance.
Once you have a baseline of strength, you can introduce eccentric-focused exercises. This involves performing the lowering phase of an exercise very slowly. For example, you can take four to six seconds to lower yourself during a split squat.
You can also use eccentric overload tools, such as flywheel training. A systematic review of eccentric-overload training analyzed nine randomized controlled trials. The researchers found that the eccentric-overload group completed change-of-direction tasks 1.35 standard deviations faster than control groups.
This demonstrates a strong correlation between eccentric strength and court agility. To implement this, try using a slow descent on single-leg exercises, or perform Nordic hamstring curls to build posterior strength.
Isometric exercises require you to hold a position against resistance without moving. This training teaches your nervous system to stabilize a joint under high tension.
These holds should be performed at the joint angles you experience during deep court movements. While they do not replace dynamic movement, they are excellent for building tendon durability.
Court sports are played in multiple directions. Therefore, your plyometric training must include horizontal and lateral movements, rather than just vertical jumps.
The National Strength and Conditioning Association recommends focusing on landing mechanics before trying to maximize jump distance. You must learn to land quietly and hold your balance for two seconds before starting your next repetition.
To translate your gym strength into court agility, you must perform structured on-court movement drills. These drills should progress from simple, planned actions to complex, reactive movements.
Before you run, you must learn how to accept weight in a stationary position. This build-up phase teaches your joints to align under tension.
Drill: Split-Stance Brake Hold
This phase introduces momentum. You will practice using multiple steps to slow down, rather than slamming on the brakes in one step.
Drill: Three-Step Approach and Hold
Most court movements occur side-to-side. This drill teaches your outside leg to absorb lateral momentum.
Drill: Shuffle-Brake-Push
Now we increase the movement angle. Sharper angles require greater force absorption and better hip control.
Drill: The Angle-Cut Progression
Unplanned movements create higher knee loads because you have less time to organize your posture. This phase introduces visual and auditory cues.
Drill: Coach-Point Reaction
This phase integrates movement with actual shot execution. This is where we bridge the gap between fitness and sport-specific skill.
Drill: Lunge and Strike
Finally, we perform repeated patterns to build specific endurance. However, we must ensure that fatigue does not ruin your movement mechanics.
Drill: The Alley-Shuttle Drill
For more movement drills and athletic longevity guidelines, you can browse our comprehensive library of court movement resources.
When players try to improve their agility, they often fall into several common traps. Recognizing these mistakes can save you from unnecessary joint stress and poor performance.
Many players spend hours running through agility ladders, moving their feet as fast as possible. While this improves foot speed, it does not teach you how to absorb force. Agility requires you to produce and manage high ground-reaction forces. If you cannot apply deep, eccentric force against the floor, you will not be able to stop or change direction quickly.
This is the most common technical error on the court. Players run at full speed and try to stop completely on their very last step. This concentrates all of the braking force into a single joint.
Instead, you must use your penultimate and antepenultimate steps to shed velocity. Think of it as a smooth braking sequence rather than a sudden crash.
While lowering your center of mass is essential, you should not sit too deeply. If your hips drop below your knees on court, you will be too low to move effectively.
Your hips will be stuck far behind your feet, making it very difficult to push off. The goal is a athletic, loaded position that allows you to spring in any direction, not a maximum-depth squat.
Because eccentric training causes structural micro-tears in your muscle fibers, it can make you very sore. Some players believe that extreme soreness is a sign of a great workout.
In reality, excessive muscle damage impairs your coordination and limits your movement quality. Your goal should be progressive, manageable exposure, not training to failure.
The friction of the court surface completely changes your braking mechanics. Clay courts allow players to slide into their shots, which absorbs force over a longer duration. Hard courts, indoor carpets, and pickleball courts offer high traction, causing your feet to catch instantly.
If you try to brake on a hard court the same way you do on clay, you can easily tweak a joint. You must adjust your step volume and approach speeds based on the court you are playing on.
High-intensity deceleration is incredibly taxing on the human body. Eccentric muscle contractions create mechanical stress that leads to microscopic damage in the muscle fibers. This damage triggers an inflammatory response that is necessary for adaptation, but it requires adequate recovery time.
Research has shown that high-braking sessions are associated with elevated levels of creatine kinase. Creatine kinase is an enzyme that serves as a marker for muscle damage. In field sports research, players showed an average increase of 129 percent in post-match creatine kinase after performing high volumes of deceleration.
This muscle damage can cause soreness and reduced power output for up to 72 hours. Therefore, you should not perform intense deceleration sessions back-to-back.
You must manage your weekly movement volume carefully. Research shows that a sudden increase in cumulative deceleration loads over a two- to four-week period is linked to an increased risk of overuse injuries.
To optimize your recovery and tissue health, prioritize sleep, hydration, and active mobility. You can find detailed recovery strategies in our player health category to help you structure your training weeks.
While soreness is normal after beginning a new training program, pain is not. You must be able to distinguish between benign muscle fatigue and potential joint or tissue damage.
If you experience any of the following warning signs, stop training immediately and consult a physical therapist or sports physician:
Working with a qualified professional can help you identify structural weaknesses. They can provide a personalized rehab protocol to get you back on the court safely. If you have questions about our research-led movement frameworks, feel free to visit our about page or contact us directly.
To ensure athletic longevity, you must progress your training systematically. Do not move to advanced drills until you have met the physical and technical criteria of your current phase.
If you answered yes to all of these questions, you are ready to increase your speed, sharpen your movement angles, or introduce reactive elements.
Profile: Sarah is a 35-year-old competitive tennis player. She is incredibly fast off the line, but she struggles to recover after hitting wide balls. She frequently overshoots her target and suffers from chronic knee soreness.
Assessment: Sarah is concentric-dominant. She has excellent acceleration but lacks the eccentric strength needed to slow her body down. As a result, she slams all her weight into her knee joints at the end of a sprint.
Profile: David is a 55-year-old pickleball player. He wants to maintain his court coverage but is worried about his Achilles tendon and knee joints as he ages.
Assessment: David has good general fitness, but his tendons are less elastic than they used to be. He needs to build calf and ankle stiffness while learning to use his hips to absorb force, saving his knees from excessive load.
To ensure you are building a balanced physical profile, you can explore our complete archive of training articles at the Evercourts blog.
Come back to this field manual at the start of your off-season, when recovering from a lower-limb strain, or whenever you feel your court movement becoming heavy and difficult to control. Building exceptional braking capacity takes patience, but it is one of the most effective investments you can make in your athletic longevity.
Follow Evercourts for practical insights on tennis, pickleball and padel performance, movement, recovery and healthy ageing. Stay connected for new articles, research-led guidance and ideas to help you play well and keep playing for years.


Read practical guidance for better movement, smarter preparation and a game that keeps working for you.
explore the Blog



