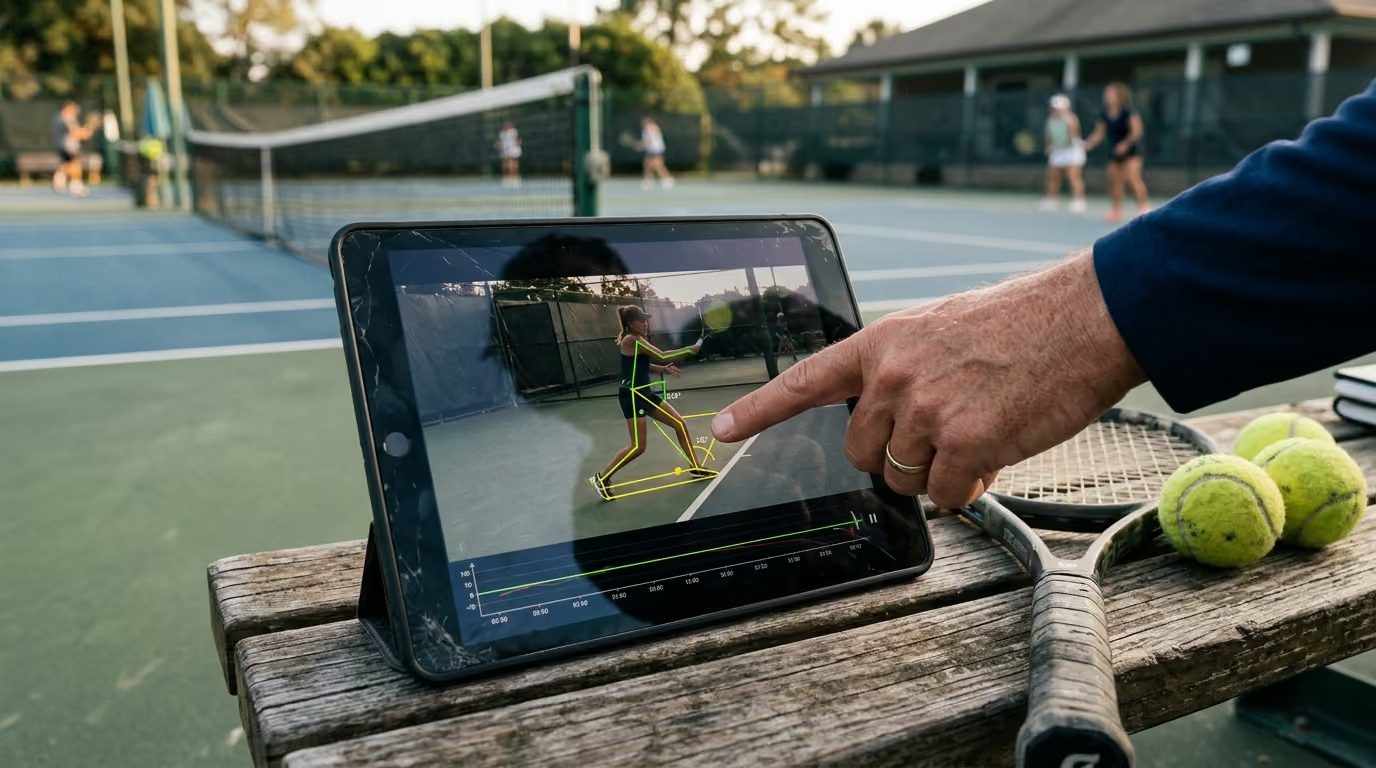

Analyzing racquet sports movement on video helps identify specific transition phases where balance or timing breaks down, leading to more consistent court coverage.




Many players spend years modifying their stroke mechanics when the actual problem is their court movement. You might struggle with a late forehand, or you might find yourself constantly off-balance at contact. If you do not analyze your movement patterns, you will likely keep repeating the same tactical errors.
To evaluate your movement effectively, record your play from a fixed angle and divide the footage into a five-step sequence of preparation, first step, braking, contact, and recovery. Instead of worrying about precise body angles, focus on finding the single transition phase where your balance or timing begins to break down. This targeted approach helps you make simple adjustments in practice that will lead to more consistent court coverage.
At Evercourts, we believe that smarter movement is the key to a lifetime of play. By learning how to review your own video, you can protect your joint health and enjoy the sport for years to come.
Court movement is not a single action but a rapid sequence of decisions and physical transitions. When you watch a match, you see players constantly accelerating, stopping, and changing direction. Biomechanical research shows that these movements are highly demanding and task-dependent.
A key study published in the Journal of Strength and Conditioning Research examined the impact of the split step. Participants using a split step were 13.1 percent faster over a 2.70-meter movement distance than those who did not use it. The split-step condition also led to a 43.6 percent faster interval from the stimulus to the onset of force production. The researchers noted that players using a split step produced greater mean and peak vertical forces. This indicates that the split step is not just a ritual, but a highly effective way to prepare the body to produce and redirect force.
However, we must interpret laboratory findings with caution. This study used a controlled, simulated response task rather than a dynamic match-play situation. In actual match play, movement patterns are much more complex and varied. For example, research on tennis players shows that movement speeds around the split step vary based on the situation. Players showed speeds of 0.55 to 1.2 meters per second for serving and returning, 0.7 to 1.66 meters per second for baseline strokes, and 0.78 to 1.9 meters per second for net play. This suggests that your preparation must adapt to where you are on the court.
Analysis of professional match play highlights the sheer volume of these transitions. An Australian Open study found that players averaged 1.3 to 1.4 shots per change of direction. They covered approximately 4.8 meters between each change of direction. Men changed direction every 2.7 seconds, while women did so every 3.1 seconds. Interestingly, medium-intensity changes of direction made up 88 to 94 percent of all movements. High-intensity cuts below 45 degrees were less frequent but highly demanding.
This repeated stopping and starting places immense strain on the lower body. Horizontal deceleration involves reducing whole-body momentum while controlling and distributing high-impact peak forces. Elite players manage these forces through superior trunk control and lower body strength. A study of Grand Slam players showed that higher-ranked competitors displayed significantly greater peak speed and deceleration intensity during lateral movements than lower-ranked players.
For more specialized movement training, you can browse our mobility and movement resources to find targeted exercises.
While recording your play on a phone is useful, you must understand the limitations of two-dimensional video. A 2D video cannot measure kinetic variables like ground-reaction forces, tissue loading, or joint moments. Furthermore, camera angles can easily distort what you see.
Research in sports biomechanics shows that 2D frontal-plane measurements do not always agree with 3D motion-capture systems. For instance, a knee that appears to cave inward on a phone clip might actually be aligned correctly. The apparent angle can be distorted by your clothing, your foot rotation, or the angle of the camera.
Frame rate is another important factor to consider. Fast athletic events can be missed if your camera records at a low sampling rate. One motion-analysis study reported that a minimum sampling rate of 100 Hz was required to detect key joint events. An error of just 20 milliseconds in identifying a foot contact could lead to an incorrect knee angle calculation of up to 20 degrees. Since standard phones usually record at 30 or 60 frames per second, you should avoid using your footage to make precise physical diagnoses.
Instead of trying to calculate exact angles, use your video for qualitative screening. Look for broad patterns like late steps, uncontrolled braking, or delayed recovery. This practical approach will keep you from getting lost in technical details that a phone camera cannot reliably measure.
To get reliable information from your video, you must establish a consistent recording protocol. A shaky, handheld camera that follows the ball is nearly useless for analyzing movement. If the camera is constantly moving, you cannot accurately assess your spacing or your approach speed.
Always use a sturdy tripod or a fence mount to keep the camera completely still. Place the camera at a height that captures your entire body, including your feet, throughout the entire movement. Chest height is usually ideal for most angles.
To build a complete picture of your movement, you should use three primary camera views. Each view highlights different aspects of your footwork and posture.
Place the camera directly behind the baseline, looking down the center of the court. This angle is excellent for analyzing lateral symmetry and footwork sequences. You can observe whether you push off with equal power from both legs. It also shows your recovery direction and your lateral court coverage.
Position the camera parallel to the baseline, about mid-court. This angle is the best way to evaluate approach speed, braking mechanics, and trunk position. You can see if your body continues to drift forward after you hit the ball. It also helps you assess your spacing relative to the ball.
Set the camera high and wide, capturing the entire court. This view is ideal for analyzing your tactical movement and your overall court positioning. You can evaluate your split-step timing relative to your opponent's contact. It also shows whether you recover to the correct tactical position after each shot.
To make your video analysis truly useful, you must record the entire movement sequence. Do not crop the video to show only the split second of ball contact. The footage must include the opponent's stroke, your preparation, your approach, your hit, and your recovery. Removing the events that lead up to the shot makes it impossible to diagnose the root cause of a movement error.
When you sit down to review your footage, you need a simple system to keep from feeling overwhelmed. Do not try to look at every single joint and muscle at the same time. Instead, use a structured framework that breaks the movement down into five distinct phases.
For every movement sequence you review, ask yourself these five questions:
This sequential framework helps you find the exact point where a movement breaks down. In court sports, movement is a chain of events. A contact problem is often caused by a braking problem, and a braking problem is usually caused by a poor first step.
A common mistake in self-analysis is focusing solely on the moment of contact. If you see yourself reaching awkwardly for a ball, you might assume you have a technical stroke error. However, this reach is often just a symptom of an upstream movement failure.
To find the actual cause, you must look at the steps that preceded the hit. Ask yourself if you recognized the ball's trajectory early enough. Check if your split step was timed correctly. Look to see if your first step was directed toward the ball or if you took an unnecessary extra hop.
By tracing the movement backward, you will often find that the real issue happened several seconds before contact. For example, a late split step will delay your entire approach, forcing you to run at maximum speed and brake too late. Correcting the timing of your split step is often the fastest way to improve your contact quality.
If you try to correct your ready position, your first step, your braking, and your recovery all in the same week, you will likely get frustrated. Your movement will become stiff and robotic as you try to think through every action on the court.
Instead, select one single movement phase to analyze across several repetitions. Watch five or ten similar clips to see if a specific error occurs repeatedly. Once you identify a consistent pattern, form a simple hypothesis and test a single change in your next practice session.
For instance, you might notice that you are still accelerating at contact on wide shots. Your target for the next week should be to start your deceleration one step earlier. Do not worry about your racquet height or your recovery position until you have resolved the braking issue.
To perform a high-quality video review, you need to know exactly what to look for in each phase of the movement. Use these practical checklists to evaluate your footage systematically.
Your preparation sets the tone for the entire movement. When analyzing this phase, watch how your body behaves just before your opponent strikes the ball.
Look closely at the depth of your stance. A deep knee bend might look athletic, but it can actually delay your first step if it leaves you stuck on your heels. You want to be ready to move, not frozen in a deep squat.
The first step is the initial directional movement you make after recognizing where the ball is going. It is often the most critical transition in the entire sequence.
Compare your first step on successful plays to your first step on plays where you arrived late. You will often find that a slow approach is caused by a hesitant or misdirected first step.
Braking is the process of reducing your forward or lateral momentum so you can organize your stroke. Because horizontal deceleration involves high-impact forces, this phase is incredibly important for athletic longevity.
To learn more about keeping your joints healthy as you age, visit our injury prevention resources.
If you observe yourself running through your shots, your braking is starting too late. This forces your upper body to compensate for your movement, leading to inconsistent contact and increased joint strain.
Your contact position includes your physical relationship to the ball at the moment of impact. It is the culmination of your entire approach.
Try classifying your contacts into categories like organized, emergency, or avoidable emergency. This will help you see if your movement is giving you the time you need to play high-quality shots.
Recovery is your transition back to a ready state after you have hit the ball. A slow recovery will leave you vulnerable to your opponent's next shot.
If your recovery is slow, check to see if your follow-through is blocking your movement. An excessively long or uncontrolled swing can leave you off-balance and unable to move quickly.
While the basic principles of movement are the same across all racquet sports, the specific demands of each game are quite different. You must adapt your video analysis to match the unique dimensions and tempos of your sport.
Tennis is played on a large court, which means you must cover significant distances. This demands high peak speeds and intense horizontal deceleration. You will often use wide crossover steps to chase down deep balls, and you must rely on large slide or plant steps to brake.
When analyzing your tennis video, pay close attention to your split-step timing and your deceleration distance. Because you have more ground to cover, starting your movement early is absolutely critical. If you play on large courts, our tennis articles offer deep insights into baseline positioning.
Pickleball is played on a much smaller court, and the game is defined by rapid, short steps. You will rarely use large crossover steps at the kitchen line. Instead, you must rely on small, precise shuffles to maintain a stable, low position.
When reviewing your pickleball footage, look for quiet, efficient movement. You want to see minimal head movement and rapid, compact footwork. Your split step will be much smaller and more frequent than in tennis. You can read our specialized pickleball articles to master kitchen line movement.
Padel is played in an enclosed glass cage, which completely changes the nature of your movement. You must often move diagonally backward, let the ball pass you, and hit it after it rebounds off the glass wall. This requires excellent spatial awareness and a unique pivoting footwork pattern.
When analyzing your padel video, look closely at how you transition from moving forward to moving backward. Watch your footwork as you prepare to hit the ball off the wall. You want to see a controlled pivot and a stable base of support as you wait for the rebound. For more details on court tactics, see our padel articles.
To help you apply this knowledge, let us look at six common movement patterns that players often see on video. Each case study shows how to identify the issue and test a practical solution.
You notice on video that you are constantly reaching for wide forehands. You hit the ball beside or behind your body, and your shots frequently miss wide or hit the net.
To investigate this, watch the sequence of events before you hit the ball. Look at the opponent's contact, your split step, your first step, and your braking. You will likely find that your split step occurred late, which delayed your first step and forced you to brake after the ideal contact zone.
To test a solution, focus on landing your split step just after your opponent's racquet contacts the ball. Compare three wide balls with early split steps to three with late split steps. You should see that the earlier preparation gives you the time you need to set up comfortably.
You are a fast player, and you reach the ball quickly. However, your video shows that you are often running through your shots, leading to inconsistent contact and missed targets.
In this case, your acceleration is excellent, but your braking starts too late. You are attempting to hit the ball while your body is still traveling forward or laterally at high speed.
To correct this, practice starting your deceleration one or two steps earlier. On video, look for a transition from long, aggressive strides to shorter, more controlled braking steps before you begin your swing. This adjustment will help you arrive at the ball with manageable momentum.
You look like a professional athlete in your ready position. Your knees are deeply bent, your back is straight, and your weight is balanced. However, you notice that you react slowly to your opponent's shots.
The issue here is that your ready position is too deep and static. You are locked into a deep squat, which makes it incredibly difficult to initiate movement quickly. You must rise up before you can push off, which delays your first step.
To resolve this, test a slightly higher, more dynamic stance. Your knees should be softly bent, and your weight should be on the balls of your feet. On video, verify that you can transition immediately into your first step without any unnecessary vertical movement.
You hit an excellent, powerful shot, but you are completely out of position for your opponent's reply. Your video shows that you often stand still and watch your shot instead of moving back into position.
This is a classic recovery error. Your follow-through is likely blocking your next movement, or you are simply waiting to see where your shot lands before you start to recover.
To fix this, focus on initiating your recovery step as soon as your swing is complete. On video, measure the time from your ball contact to your first recovery step. Your goal should be to reduce this interval, returning to a neutral court position before your opponent strikes the ball.
You move beautifully to your right, but your movement to your left feels slow and awkward. On video, you see that you use different footwork patterns depending on which direction you are traveling.
Before you panic, compare matched balls. Make sure you are comparing shots with similar speeds, heights, and angles. Often, what looks like a physical limitation is actually just a tactical preference or a response to different stroke demands.
If the asymmetry is persistent across all types of shots, it may be due to a strength or mobility difference. You can use simple drills to practice pushing off with your non-dominant leg to build coordination and balance.
You hit an overhead shot in padel, but you remain turned toward the side wall or take too long to return to the net. Your video shows that your landing is disorganized and your balance is poor.
Research on landing after overhead strokes shows that different movement paths place unique demands on the lower body. For instance, a back-step landing can lead to greater knee strain if your foot is not positioned correctly.
To improve your recovery, watch your footwork as you land. You want to see a controlled pivot that immediately aligns your chest and hips with the net. This landing organization will allow you to take a quick first recovery step and maintain your position at the net.
When analyzing your own video, it is easy to make assumptions that are not supported by sports science. Avoid these two common errors to keep your analysis safe and effective.
Many coaches tell their players to get lower on the court. While a lower center of mass can assist with braking and changing direction, extreme knee flexion is not always helpful.
If you bend your knees too deeply, you will lock your joints and reduce your ability to push off quickly. The ideal knee angle is one that allows you to move dynamically, brake efficiently, and recover without pain. Do not judge your movement by how low you can squat, but by how well you transition between phases.
It can be tempting to use your slow-motion video to check for injury risks like knee caving (valgus). However, as we discussed earlier, 2D video is not reliable for making clinical assessments.
A camera angle that is slightly off-center can make a perfectly healthy knee look like it is caving inward. Clothing and rapid movement can also create visual distortions. Using a phone clip to diagnose physical issues can lead to unnecessary anxiety and incorrect training adjustments.
If you want to build a resilient body for court sports, look at our injury prevention resources for evidence-based advice. Keep your video analysis focused on performance, balance, and timing rather than joint angles.
Your movement quality has a direct impact on your physical recovery, your fatigue levels, and your overall tissue health. Efficient movement is not just about playing better; it is about protecting your body from excessive wear and tear.
When you move inefficiently, you waste energy. For example, if you consistently brake too late, your muscles must absorb massive eccentric forces to stop your momentum. This puts intense strain on your quadriceps and patellar tendons, which can lead to soreness and joint fatigue.
By learning to brake earlier and distribute the forces of deceleration across multiple steps, you can reduce this physical stress. This improves your movement economy, allowing you to play longer matches without experiencing sudden drops in performance.
Managing your court movement is an essential part of athletic longevity. If you want to learn more about how to manage your training load and recover effectively, visit our recovery science resources.
Video self-analysis is an excellent tool for improving your court movement and your tennis, pickleball, or padel performance. However, it is not a substitute for professional medical care.
You should consult a qualified physical therapist or healthcare provider if you experience any of the following:
Do not attempt to coach or train through physical pain. A professional assessment can help you identify any underlying strength or mobility limitations, ensuring you can continue playing safely for years to come.
To begin analyzing your movement this week, follow this simple checklist:
Follow Evercourts for practical insights on tennis, pickleball and padel performance, movement, recovery and healthy ageing. Stay connected for new articles, research-led guidance and ideas to help you play well and keep playing for years.


Read practical guidance for better movement, smarter preparation and a game that keeps working for you.
explore the Blog



