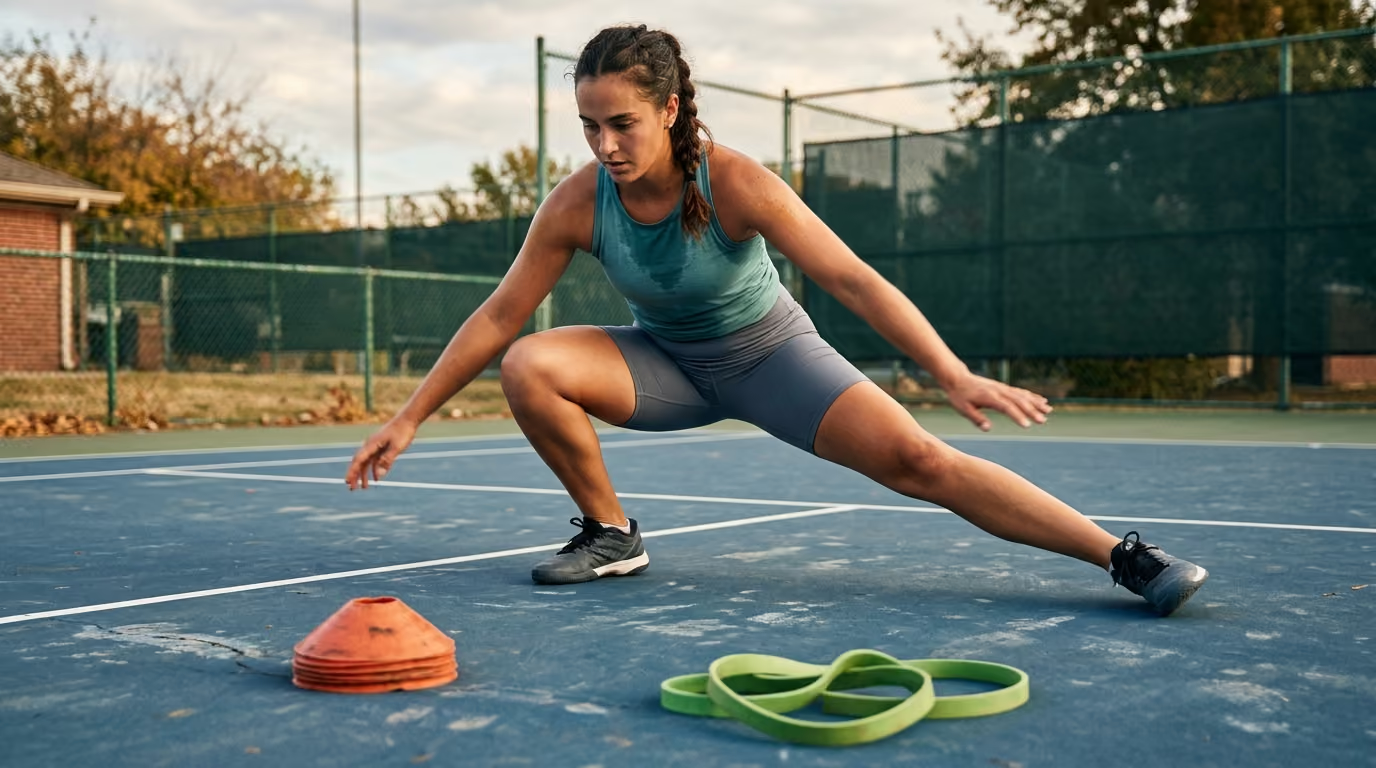

When a player needs to stop, start, or respond to a ball, court-ready movement involves accessing, controlling, and using joint ranges dynamically.




Court-ready movement is not simply the ability to reach a deep stretch on a static mat. It is the ability to access, control, and use joint ranges dynamically while stopping, starting, and responding to a ball. To build this movement quality, players must progress systematically from quiet, passive stretches to loaded, reactive, and sport-specific court patterns.
Many players assume that possessing long muscles is the key to moving well. However, traditional flexibility only refers to the passive length of a muscle group. It does not account for how well your central nervous system controls that length during a dynamic match.
If any element in this equation is missing, your passive range will not show up on the court. To understand how your body uses its movement capacity, we must divide joint motion into four distinct categories.
This is the motion your joints can achieve with external assistance, such as gravity or a stretching strap. It serves as your structural ceiling. If you cannot reach a position passively, you will not reach it during a sprint.
This is the motion you can create using only your own muscular effort. It requires coordination and active muscle contraction. This range is almost always smaller than your passive range.
This is the motion you can control while accepting your body weight or external force. For example, a deep lateral lunge under gravity requires loaded hip range. This is where your strength begins to protect your joints from excessive strain.
This is the motion you can access rapidly in response to an unpredictable ball or opponent. It represents the ultimate test of court movement. If your nervous system does not feel safe in a position, it will restrict your reactive range to prevent injury.
Research from scholarly reviews on flexibility shows that increasing joint range beyond what is required for your sport does not improve performance. In fact, excessive flexibility without control may even reduce your power. The goal is to build an adaptable body that can produce force in the positions your sport demands.
To build reliable court movement, you cannot jump straight into high-speed cutting drills. You must systematically build control from the ground up. This begins with a thorough assessment of how your body moves today.
Before choosing a drill, you must identify your specific movement limitations. We recommend evaluating your physical capacity in a systematic order.
First, check your symptom status. If you have active pain, swelling, or joint instability, you should not perform aggressive mobility work. These symptoms require professional clinical evaluation.
Second, check your basic joint motion. Assess your ankle dorsiflexion, hip rotation, knee flexion, and thoracic spine rotation. Look for obvious restrictions or side-to-side differences.
Third, test your active control. Can you actively reach your passive joint limits without losing your balance? If you must wobble or compensate to reach a position, you lack active control.
Fourth, check your single-leg capacity. Perform a single-leg squat or a controlled step-down from a low box. Note whether your knee caves inward or your trunk sways outward.
Fifth, observe your movement-specific performance. Watch how you accelerate, brake, and shuffle during practice. Finally, monitor your movement under fatigue. If your technique falls apart after a long set, your movement capacity is not yet resilient.
Once you identify a limitation, the next step is restoring quiet joint range. We use gentle, low-intensity drills to improve joint articulation.
For the ankle, focus on split-stance ankle rocks. Keep your heel firmly on the floor while driving your knee forward over your toes. This simple movement directly improves ankle dorsiflexion.
To restore hip motion, use controlled 90/90 transitions on the floor. Sit with one leg bent at ninety degrees in front of you and the other bent at ninety degrees behind you. Slowly rotate your pelvis from side to side to address internal and external rotation.
For the trunk, practice quadruped thoracic rotations. Place your hands and knees on the floor, put one hand behind your head, and rotate your elbow toward the ceiling. This keeps your chest open and reduces rotational stress on your lower back.
For the feet, perform short-foot exercises. Pull the ball of your foot toward your heel to lift your arch without curling your toes. This builds a stable base of support for your entire leg.
Now that you can access these positions passively, you must teach your brain to control them. This requires active muscular tension at your joint limits.
To progress your ankle control, use split-stance dorsiflexion with an isometric pause. Drop into a deep stride, push your front knee forward, and hold that position for ten seconds using your lower leg muscles. This teaches your nervous system to accept tension at the end of your ankle range.
For the hips, progress to active 90/90 transitions without using your hands for support. Keep your spine tall as you rotate your legs. You can also add a five-second hover with your back leg to build active internal rotation.
This phase is where your mobility and movement training begins to transfer to the court. You are no longer just stretching a muscle. You are teaching your nervous system how to use its available architecture.
Court movement requires you to handle high physical forces while your joints are bent or rotated. To prepare for this, you must introduce external resistance.
Use split squats to strengthen your hips and knees in a long stance. Lower your hips slowly, pause at the bottom, and drive back up. This builds eccentric strength in your quadriceps and glutes.
Incorporate lateral lunges to prepare your body for wide steps. Step to the side, sink your hips back, and keep your trailing leg straight. This loads your hip adductors and prepares them for sudden lateral braking.
Add Copenhagen planks to strengthen your inner thighs and groin muscles. Lie on your side, place your top foot on a bench, and lift your hips. This exercise builds essential lateral stability for rapid court changes of direction.
Strength and plyometric training are highly effective for improving your movement mechanics. By loading your joints in deep positions, you build a body that can handle the violent forces of competitive play.
Stopping is the most physically demanding part of court movement. To protect your joints, you must train your body to brake efficiently before you focus on acceleration.
Deceleration produces exceptionally high ground-reaction forces. A study from the Journal of Sports Sciences reported that horizontal braking forces can be up to six times greater than those experienced during constant-speed running. This extreme load requires a systematic training progression.
Begin with low-speed marching stops. Take a few steps forward, then stop suddenly by lowering your center of mass. Keep your trunk upright and your stopping foot slightly ahead of your hips.
Next, progress to linear deceleration. Sprint forward for five meters, then brake completely within a designated three-meter zone. Focus on taking multiple quick, soft steps rather than one rigid stop.
Once you master linear stops, increase your approach velocity. Sprint faster and monitor how your body responds to the sudden deceleration. If you hear a loud landing noise or feel your knees collapse inward, reduce your speed.
Finally, practice braking under mild fatigue. Perform short, repeated stopping drills with brief rest periods. Stop the session immediately if your stopping distance increases or your posture begins to waiver.
A planned change of direction is a predetermined movement where you know exactly where you are going. This allows you to focus purely on physical mechanics without decision-making stress.
To program these movements safely, you must manipulate the angle and the speed of your cuts. Sharp angles and high speeds create the greatest mechanical demand on your knees and hips. Use a progressive formula to build these skills.
Start with a forty-five-degree redirection at a moderate jog. This angle requires very little braking and allows you to maintain your momentum. Focus on pushing off the inside edge of your outside foot.
Next, increase the angle to ninety degrees while keeping your speed moderate. This wider cut requires you to lower your hips and use your penultimate step to absorb force. Your second-to-last step should do most of the braking, leaving your final step free to direct your movement.
Once your mechanics are clean at low speeds, apply the same progression to high-speed approaches. This systematic exposure allows your tendons and muscles to adapt to the high lateral forces. It also prevents you from overloading your knees with sudden, sharp cuts before your tissues are ready.
In a real match, you never know exactly where the ball will land. Planned drills are excellent for building physical capacity, but they do not train your brain to react. To make your movement truly court-ready, you must introduce perception.
Agility is the combination of physical movement and cognitive decision-making. Research indicates that the perceptual components of agility are highly trainable through open motor-skill practice.
Start with simple auditory cues. Have a partner call out "left" or "right" as you shuffle. Respond to the sound as quickly as possible without anticipating the cue.
Next, transition to visual direction cues. React to your partner pointing a hand or dropping a colored ball. This forces your eyes to scan the environment and translate visual information into physical movement.
Progress to mirror drills. Stand opposite a partner and attempt to match their lateral movements exactly. This drill closely replicates the unpredictable nature of defending a court.
Finally, integrate ball-based cues. Have a partner feed balls with different trajectories, spins, and speeds. This forces you to estimate ball flight while organizing your feet to make a clean strike.
The final phase of our framework combines all these physical and perceptual skills into realistic sport-specific sequences. These patterns should mimic the exact spatial demands of your game.
One highly effective pattern is the split step to lateral recovery. Start with a light jump as your partner feeds a ball. Land softly, push off laterally to reach an imaginary wide shot, brake smoothly, and shuffle back to the center of the court.
Another sequence is the forward closeout to pivot. Sprint forward to defend a drop shot, brake using multiple quick steps, pivot ninety degrees, and backpedal to cover a lob. This pattern requires exceptional hip rotation and pelvic control.
You can also practice the recovery crossover. Run wide to hit a deep shot, plant your outside foot, and use a powerful crossover step to cover the open court. This transition requires great lateral power and trunk stability.
Always ensure these integrated patterns include realistic rest periods. Training reactive movement under extreme fatigue defeats the purpose of the drill. Your nervous system needs to be relatively fresh to build high-quality motor patterns.
While all racquet sports require agility, each game places unique physical demands on your body. Understanding these differences allows you to tailor your training to your specific sport.
Tennis is played on a large court, which means players must cover significant distances at high velocities. This creates massive deceleration demands and requires highly robust eccentric leg strength.
The game also features extreme lateral reaches. Players must frequently slide on clay or sprint and plant on hard courts. To stay healthy, tennis players must prioritize deep ankle dorsiflexion and lateral hip power. For more resources on managing these high-stress movements, explore our targeted injury prevention articles.
Pickleball is played on a much smaller court, but it features incredibly fast reaction times. Players spend a significant amount of time at the kitchen line, which demands a low, wide base of support.
This constant low stance puts a high isometric demand on the quadriceps and calves. Pickleball players rarely experience high-velocity sprints, but they do perform hundreds of quick, short lunges. To support healthy aging and athletic longevity, these players should focus on knee comfort and active hip flexion.
Padel is played in an enclosed glass cage, which introduces complex rotational demands. Players must constantly turn their hips and shoulders to play balls off the back and side walls.
This environment requires exceptional thoracic spine mobility and rapid pelvic dissociation. Padel players must also transition quickly from defense to offense, requiring short bursts of vertical and diagonal acceleration. In our experience, neglecting hip and thoracic rotation is a major cause of early morning stiffness for padel enthusiasts.
Even well-intentioned players can waste valuable training time by following outdated or counterproductive movement advice. Avoiding these common pitfalls will keep your progress on track.
Many players spend hours holding passive static stretches in search of longer muscles. However, possessing joint range that you cannot actively control does not improve your court movement.
If you have a flexible joint that lacks strength, your nervous system will simply tighten the surrounding muscles during a match to protect you. Instead of chasing maximal range, focus on building strength and control within the range you already have.
Holding static stretches for thirty seconds or longer right before a match can temporarily reduce your muscular power. Research from systematic reviews of warm-up methods indicates that static stretching can decrease explosive jump performance.
Instead, use short, active stretches and dynamic movements before you play. Save your long, passive stretches for evening recovery sessions when your only goal is to relax your nervous system.
Running through a fixed pattern of cones as fast as possible is a test of planned movement, not agility. It ignores the critical perceptual and decision-making skills required in a real sport.
If you only train with predictable cone drills, you will struggle when an opponent hits an unexpected shot. Always transition from planned physical mechanics to unpredictable, reactive drills to ensure your speed transfers to real match play.
There is no single posture that works for every change of direction. Biomechanical demands vary wildly depending on your approach speed, your cutting angle, and your unique joint anatomy.
Instead of trying to look like a textbook drawing, focus on fundamental movement principles. Keep your center of mass relatively low, organize your trunk, use your feet to grip the court, and distribute the forces across multiple joints.
Improving your movement mechanics is not just about moving faster. It also plays a vital role in how your body recovers after a demanding match.
When you move efficiently, you distribute physical stress evenly across your muscles, tendons, and joints. Poor movement mechanics, on the other hand, force a few specific tissues to absorb an excessive amount of force. This localized overload leads to premature fatigue and chronic soreness.
I remember finishing a tough two hour padel match on a cold Tuesday night and waking up the next morning feeling like my lower back was locked in concrete. For a long time, I just accepted this as the price of playing hard in my forties. But once I started spending just ten minutes on targeted hip mobility before heading to the club, the stiffness almost completely vanished. It taught me that we do not have to accept pain as a default state of aging.
By improving my hip rotation, my lower back no longer had to twist excessively during deep wall recoveries. This simple shift in movement distribution dramatically reduced my post-match soreness and improved my recovery time. For more tips on managing post-game fatigue, check out our recovery science principles resources.
While a progressive movement framework is highly effective for healthy athletes, it is not a substitute for medical care. You must know when to step off the court and consult a qualified healthcare provider.
If you experience sharp, shooting pain during or after a movement, stop immediately. True joint pain is a clear signal from your body that something is wrong, and pushing through it will only cause further damage.
You should also seek professional guidance if you notice joint swelling, catching, locking, or a sensation that your knee or ankle is going to give way. These symptoms often indicate structural tissue damage that requires clinical evaluation.
Finally, see a professional if you have persistent, unexplained aches that do not improve with rest. A physical therapist or sports medicine physician can help identify the root cause of your discomfort and design a safe, individualized rehabilitation plan.
Yes, you can absolutely improve your movement quality at any age. Age-related stiffness is often a result of disuse and a lack of varied movement rather than permanent joint damage. By consistently practicing gentle active mobility and loaded strength work, you can restore usable range and move with greater confidence.
We recommend training high-intensity movement skills, such as deceleration and reactive agility, when your body is completely fresh. You can perform light, active joint mobility as part of your dynamic warm-up before a match. Save your demanding strength work and loaded mobility exercises for dedicated training days or after your court sessions.
Listen to the sound of your feet as you stop. If your landings are loud, heavy, and abrupt, you are likely failing to distribute the forces smoothly through your muscles. Efficient deceleration should feel controlled and sound relatively quiet, with multiple soft steps absorbing your momentum.
Side-to-side differences are very common in racquet sports due to the asymmetrical nature of the games. To address this, perform single-leg exercises, such as split squats and step-downs, on your less-coordinated side first. Match the volume on your stronger side, but do not exceed what your weaker leg can control with good technique.
Follow Evercourts for practical insights on tennis, pickleball and padel performance, movement, recovery and healthy ageing. Stay connected for new articles, research-led guidance and ideas to help you play well and keep playing for years.


Read practical guidance for better movement, smarter preparation and a game that keeps working for you.
explore the Blog



