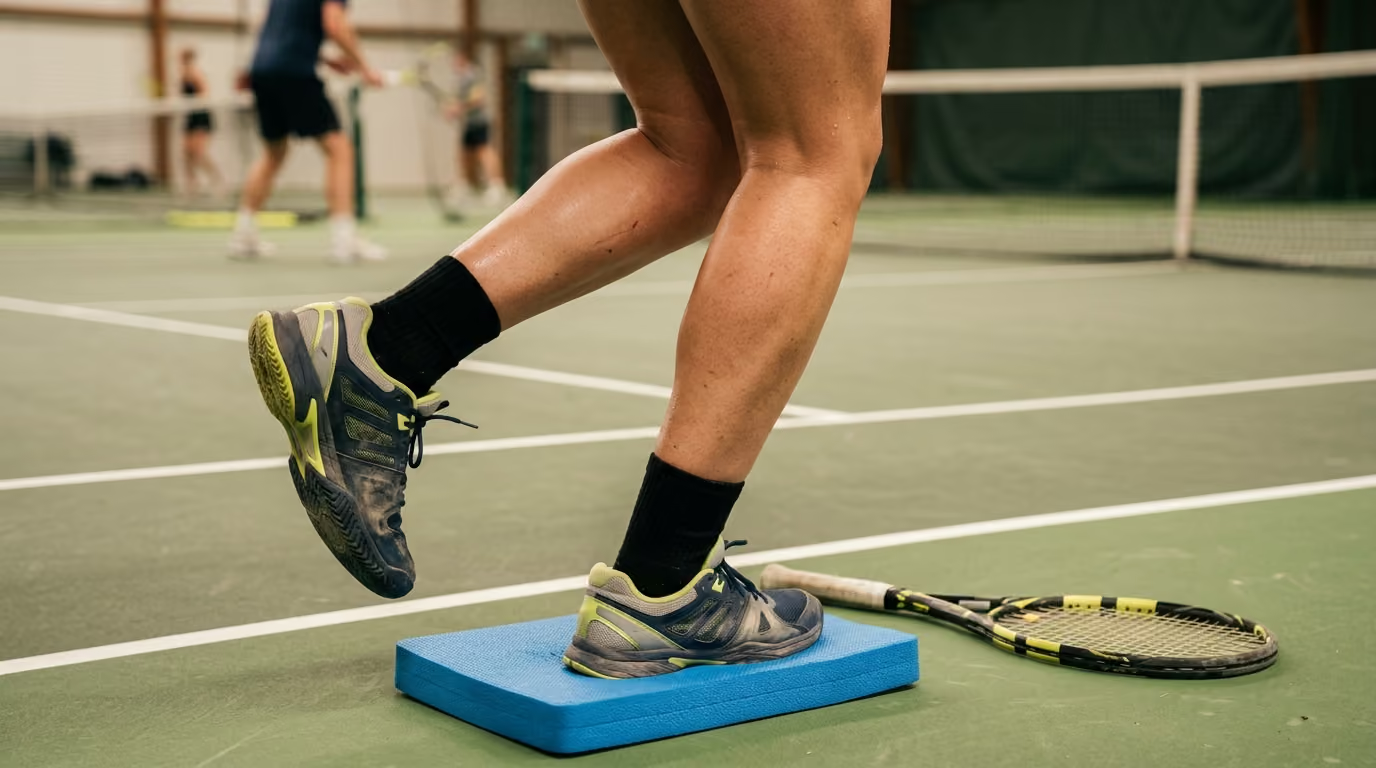

Over 12 weeks of progressive loading can significantly improve lower leg strength and tendon health for court athletes, enhancing stability and reducing injury risk.




If you have spent hours looking up why your heels feel like stone the morning after a match, or why your ankles feel sluggish during lateral movements, you are looking for a practical solution. The repetitive demands of racquet and paddle sports place immense stress on the lower limbs, often leading to persistent aches. This resource provides a comprehensive, research-supported framework to strengthen your lower legs, protect your tendons, and keep you moving fluidly.
Building foot and ankle strength for court sports requires a progressive plan that targets both muscle force and tendon elasticity. By combining calf raises, shin conditioning, and single-leg balance exercises, players can improve their stability and lateral speed. This consistent training prepares the tissues to absorb the repeated impacts of jumping, lunging, and sudden changes of direction.
Understanding the primary structures of the lower leg helps players choose the right exercises for their specific physical needs. The lower leg operates as a complex system of muscles, tendons, and joints that work together to manage the forces generated by court play.
The calf is not a single muscle, but a complex composed primarily of the gastrocnemius and the soleus. The gastrocnemius is the larger, double-headed muscle visible on the back of the shin. It crosses both the knee joint and the ankle joint, meaning it assists in both knee flexion and ankle plantar-flexion. Because it crosses the knee, the gastrocnemius is most active when the leg is straight.
The soleus lies beneath the gastrocnemius and crosses only the ankle joint. This muscle is highly active when the knee is bent. In court sports, the soleus plays an understated role. It absorbs high eccentric loads when you lower into a deep defensive crouch or lunge for a low ball.
Both muscles join together to form the Achilles tendon, which inserts into the heel bone. To build complete calf strength, athletes must include both straight-knee and bent-knee calf work. Neglecting either variation leaves a significant gap in lower leg capacity.
The Achilles tendon is the thickest and strongest tendon in the human body. It acts as a powerful spring, storing elastic energy during landings and releasing it during propulsion. During sprinting, hopping, and jumping, this tendon transfers high forces from the calf muscles to the foot.
Healthy tendons require structured, progressive loading to maintain their stiffness and load-bearing capacity. According to clinical guidelines on Achilles tendinopathy, progressive loading of the gastrocnemius and soleus for at least twelve weeks is essential for rebuilding tendon health. Without this structured loading, the tendon can become less efficient at storing and releasing elastic energy, which increases the stress placed on surrounding muscles.
The tibialis anterior runs down the front of the shin and is the primary muscle responsible for dorsiflexion, which pulls the toes toward the knee. This muscle group plays several critical roles on the court:
While calf training receives the most attention, weak shin muscles can lead to early fatigue and shin splints. Balancing your lower leg training means pairing calf work with targeted dorsiflexion exercises.
The intrinsic foot muscles are small muscles that reside entirely within the foot. They do not cross the ankle joint, but instead support the medial longitudinal arch. These muscles act like the active suspension system of an automobile, adjusting foot stiffness based on the surface beneath you.
When these muscles are strong, they help the foot transition between a flexible adapter during landing and a rigid lever during propulsion. The short-foot exercise is a common movement used to target these muscles. It involves drawing the ball of the foot toward the heel without curling the toes. Research on intrinsic foot training shows that these exercises can improve balance, foot strength, and sensory-motor control, particularly when combined with traditional strength training.
Each racquet sport presents a distinct movement profile. The physical demands on your lower legs vary based on the court surface, the size of the playing area, and the typical patterns of play.
Tennis involves long lateral shuffles, deep open-stance slides, and powerful forward lunges. The court surface significantly alters how your feet and ankles interact with the ground. Acrylic hard courts offer high traction, which requires abrupt braking and precise foot planting. Clay courts allow for controlled sliding, which changes how forces are distributed through the lower leg.
A study in the Journal of Physical Fitness and Sports Medicine compared player mechanics on acrylic and clay surfaces. Researchers found that players utilized greater initial knee flexion when moving on clay courts. Additionally, clay courts produced greater pressure under the big toe, while acrylic courts resulted in higher pressure across the midfoot.
This difference occurs because clay allows players to slide, requiring them to grip the surface with the forefoot to initiate recovery. This highlights a critical training concept. You cannot assume that a movement pattern developed on hard courts will translate perfectly to clay without an adjustment period for your ankles and calves.
Pickleball is played on a smaller court, but this does not mean the physical demands are minor. The game requires constant, rapid lunges to the non-volley line, short lateral adjustments, and quick backward recovery steps. Because the court is compact, players experience a high density of acceleration and deceleration cycles.
An epidemiological analysis of pickleball injuries between 2015 and 2023 identified common injury mechanisms. Running or lunging forward, planting the foot, and inverting the ankle were the most frequent causes of lower limb injuries. In this dataset, Achilles tendon ruptures accounted for a notable percentage of documented foot and ankle diagnoses.
Age and athletic preparation play a major role in these statistics. A comparative study of Achilles ruptures found that the median age for pickleball-related ruptures was sixty years. In contrast, the median age for tennis-related ruptures was forty-five years, while other sports had a median age of thirty-seven.
Furthermore, over eighty percent of pickleball ruptures occurred in players older than fifty. This suggests that the primary issue is often a mismatch between a player's enthusiasm and their prepared tissue capacity. Returning to active play after a layoff requires careful, progressive lower leg conditioning.
Padel combines short sprints, rapid changes of direction, wall rebound positioning, and explosive jump shots. This dynamic movement profile exposes the ankle to high lateral and rotational forces. Padel literature highlights high movement velocity and sudden directional changes as primary injury risks, especially for untrained players.
The Achilles tendon is heavily loaded during padel play. Every jump shot requires a rapid, concentric push-off followed by a high-force eccentric landing. To tolerate these demands, padel players need both deep calf strength to support low defensive stances and reactive tendon stiffness to manage high-velocity landings. You can learn more about managing these court demands by reading our specialized articles on padel performance and health.
The primary goal of the first training phase is to build muscle volume, tendon tolerance, and basic coordination. Before attempting explosive hops or rapid change-of-direction drills, you must establish a baseline of strength. This phase focuses on controlled movements through a complete range of motion.
In our experience, ignoring these basic lower leg demands can affect the entire biomechanical chain. I remember finishing a tough two hour padel match on a cold Tuesday night and waking up the next morning feeling like my lower back was locked in concrete. For a long time, I just accepted this as the price of playing hard in my forties. But once I started spending just ten minutes on targeted hip and ankle mobility before heading to the club, the stiffness almost completely vanished. It taught our team that we do not have to accept pain as a default state of aging. Preparing the ankles and feet is the first step in protecting the rest of your body.
This exercise targets the soleus muscle by keeping the knee bent at approximately ninety degrees.
This movement targets the gastrocnemius muscle and the general plantar-flexion complex.
This exercise builds endurance and strength in the anterior shin muscles, which help decelerate the foot during rapid court movements.
Side-to-side ankle control is vital for preventing rolling or spraining your ankles during sudden lateral adjustments.
This drill strengthens the intrinsic foot muscles to build a more active, supportive arch.
Court movement is almost entirely unilateral. When you split step, land from a jump, or lunge for a ball, you rely on a single leg to absorb and redirect force. Once baseline tissue capacity is established, you should transition to single-leg control. For tailored recovery strategies to manage the fatigue from this phase, see our guide on recovery science resources.
To move efficiently, a player must maintain a stable tripod foot. This tripod consists of three points of contact: the center of the heel, the base of the big toe, and the base of the pinky toe. If any of these points lose connection with the ground, the ankle can collapse inward or outward. This collapse forces the knee and hip to compensate, which can lead to joint stress further up the kinetic chain.
Balance training has strong clinical support for reducing the risk of ankle injuries. A systematic review published in Clinical Rehabilitation examined balance training programs in athletic populations. The researchers analyzed twelve studies involving over 1,800 athletes and found a thirty-eight percent reduction in ankle sprain incidence among those who completed regular balance training.
Another meta-analysis of seven randomized controlled trials reported a significant reduction in ankle sprains when athletes utilized proprioceptive training. The preventive benefit was especially high for players with a history of previous ankle sprains, highlighting balance work as a vital component of long-term injury prevention planning.
Simple balance drills can be modified to prepare you for the unpredictable nature of court play.
These exercises bridge the gap between static balance and dynamic court movement.
Once you have built single-leg strength and balance, you can begin training the reactive qualities of your tendons. Plyometric training improves lower leg stiffness, allowing you to move across the court with less effort.
Tendon stiffness refers to the ability of a tendon to resist deformation when a load is applied. A stiffer tendon acts like a high-tension spring, storing and releasing elastic energy rapidly. According to a meta-analysis in the Journal of Sport and Health Science, plyometric training has a moderate to strong positive effect on tendon stiffness.
However, high volumes of jumping can quickly overload unprepared tissues. A separate meta-analysis examined lower-limb stiffness and suggested that lower plyometric volumes under 250 jumps per week are highly effective when performed over a period of seven to ten weeks. This evidence supports a gradual approach to elastic loading, rather than immediately adding large volumes of intense jumps.
Perform these exercises on a non-slip surface, wearing your standard court shoes to ensure proper traction and support.
Stand with your feet hip-width apart and your knees slightly bent. Hop up and down quickly, focusing on making minimal contact with the ground and keeping your ankles stiff. Your knees should not bend significantly; the movement should be driven primarily by your calves and ankles. Complete 3 sets of 15 to 20 seconds of continuous bouncing.
Find a line on the court or floor. Hop back and forth over the line as fast as possible, maintaining a springy rhythm. Progress from forward-and-backward hops to side-to-side hops. Perform 3 sets of 10 to 15 seconds, focusing on landing softly and maintaining control.
Stand on one leg with a slight bend in your knee. Perform small, springy hops on that single leg, keeping your ankle stiff and your landing quiet. Focus on keeping your knee aligned over your foot, avoiding any inward collapse. Complete 2 sets of 10 to 12 repetitions per leg, resting fully between sets.
Push off your right foot to hop laterally to your left, landing on your left foot. Hold the landing for two full seconds, demonstrating absolute balance and control before hopping back to the right. This exercise trains your ability to absorb lateral force and stabilize your ankle quickly. Perform 3 sets of 6 to 8 repetitions per side.
Strength and elastic capacity are only useful if they translate to your sport. This phase integrates your physical gains into the specific movement patterns of tennis, pickleball, and padel.
Tennis players must manage high-force lateral stops and rapid recovery steps.
Pickleball players require exceptional front-to-back control and fast footwork near the non-volley line.
Padel players must handle rapid transitions, wall rebounds, and vertical jumps.
For a deeper dive into athletic conditioning programs, explore our library of strength and conditioning resources.
To get the most out of your calf raises, you must apply the principles of progressive overload. This means systematically increasing the load, volume, or difficulty of your exercises as your body adapts.
Start on a flat floor with both feet. Perform your raises slowly, taking two seconds to rise, holding for one second, and taking three seconds to lower. Focus on keeping your weight distributed evenly across your toes, avoiding any outward roll of your ankles. Once you can easily complete 3 sets of 15 repetitions with perfect form, progress to the next level.
Move your calf raises to the edge of a step to increase the range of motion. Transition to single-leg raises, using a wall or handrail lightly for balance. Lower your heel below the level of the step to stretch the calf, then push up to full extension. Aim for 3 sets of 10 to 12 controlled repetitions per leg.
Hold a dumbbell in the hand on the same side as your working leg to add resistance. Focus on heavier loads and fewer repetitions, such as 3 sets of 6 to 8 reps. You can also incorporate isometric holds, pausing at the midpoint of the descent for five seconds to build positional strength.
Isometric training involves holding a muscle contraction without movement. This can be highly beneficial for players who experience minor tendon discomfort or want to build endurance in deep court positions.
To perform an isometric calf hold, rise up to mid-height on a single leg and hold that position for thirty to forty-five seconds. Keep your knee slightly bent to target the soleus, or completely straight to focus on the gastrocnemius. Perform 3 holds per leg, resting for one minute between repetitions. These holds can be integrated into your warm-up routine before playing to prepare your tendons for activity.
Your shoes are the only connection between your body and the court. Choosing appropriate footwear and monitoring its condition is vital for protecting your lower leg joints.
Many recreational players make the mistake of playing court sports in running shoes. Running shoes are designed almost exclusively for forward movement. They feature thick, cushioned midsoles and high heel-to-toe drops that elevate your center of gravity. This design provides very little lateral support, which increases the risk of your ankle rolling during a quick side-to-side shuffle.
True court shoes are built with a wider, lower-profile outsole to provide a stable base of support. They feature lateral outriggers, reinforced heel counters, and stiff midfoot shanks that prevent the shoe from twisting. These features keep your foot secure, reducing sliding inside the shoe and helping protect your ankles during intense lateral movements.
Court traction is not a simple case of "more is better." If a shoe grips the court too aggressively, your foot can stick during a turn, transferring high rotational forces to your ankle and knee. Conversely, if your shoes lack grip, you may slip and strain a muscle while trying to decelerate.
The court surface should dictate your shoe choice. Clay court tennis shoes feature a full herringbone tread pattern designed to let clay release from the sole, allowing for controlled slides. Hard court shoes use a more durable rubber compound with a modified tread pattern designed to grip acrylic surfaces without sticking.
Moisture, dust, or sand on the court can significantly alter traction, requiring you to adjust your movement speed and braking distances accordingly. For more information on shoe selection, check out our articles on court lifestyle and gear.
A worn-out shoe can compromise your safety on the court. Check your footwear regularly for these key signs of wear:
Avoid these frequent training errors to keep your lower legs healthy and functional throughout the season.
Many players only perform standing calf raises, which leaves the soleus muscle underdeveloped. Because the soleus is highly active when the knee is bent, players need bent-knee calf raises to prepare for deep defensive court positions. Balance your routine by incorporating both standing and seated calf raise variations.
While balance training is excellent for joint coordination, it does not build the raw force capacity needed for explosive movement. A complete program must combine balance work with progressively loaded calf raises and shin exercises. Balance helps you coordinate your movement, but strength provides the power behind it.
Hopping and jumping drills are highly effective for building tendon stiffness, but they place immense stress on the lower legs. Adding too many jumps too quickly can lead to tendon irritation or calf strains. Start with simple, low-volume pogo hops and progress to intense single-leg hopping only after several weeks of consistent strength training.
When taking a break from your sport, your lower leg muscles and tendons can lose their conditioning quickly. Returning to play at full intensity without preparation is a common cause of Achilles tendon and calf injuries. Maintain a basic routine of calf raises and balance work during your off-season to keep your tissues prepared for your return to the court.
The tissues of the lower leg require adequate recovery time to adapt to the physical stresses of training and play. Managing your training volume and supporting tissue recovery is essential for long-term physical health.
After an intense match or a challenging strength session, your lower leg muscles can feel tight and fatigued. Gentle active recovery, such as walking or easy cycling, can help promote blood flow and reduce stiffness. This mild activity helps clear metabolic waste from the muscles without placing excessive stress on your joints.
Gentle mobility work can also assist in maintaining healthy joint motion. Focus on slowly moving your ankles through a full range of motion, stretching your calves with your knees both straight and bent, and mobilising your feet. Avoid aggressive stretching if you are experiencing acute tendon pain, as this can sometimes irritate the tissue further.
High-quality sleep and proper nutrition are the cornerstones of tissue recovery. During deep sleep, your body releases growth hormones that facilitate muscle and tendon repair. Aim for seven to nine hours of consistent sleep per night, especially during periods of heavy training or frequent match play.
Adequate hydration and protein intake are also essential for supporting tissue adaptation. Your tendons are made of collagen, which relies on proper hydration and nutrition to maintain its structural integrity. Fueling your body properly ensures that your lower legs can adapt and grow stronger in response to your training. Learn more about maintaining your physical health by exploring our player health articles.
While structured training can help prevent injuries, some situations require a professional medical evaluation. If you experience any of the following warning signs, consult a physical therapist, sports physician, or podiatrist:
A qualified professional can provide a personalized diagnosis, identify any movement compensations, and create a targeted rehabilitation plan to help you return to the court safely. For more information about our educational mission, you can visit our about Evercourts page.
Use this practical checklist to guide your lower leg training this week:
Follow Evercourts for practical insights on tennis, pickleball and padel performance, movement, recovery and healthy ageing. Stay connected for new articles, research-led guidance and ideas to help you play well and keep playing for years.


Read practical guidance for better movement, smarter preparation and a game that keeps working for you.
explore the Blog



