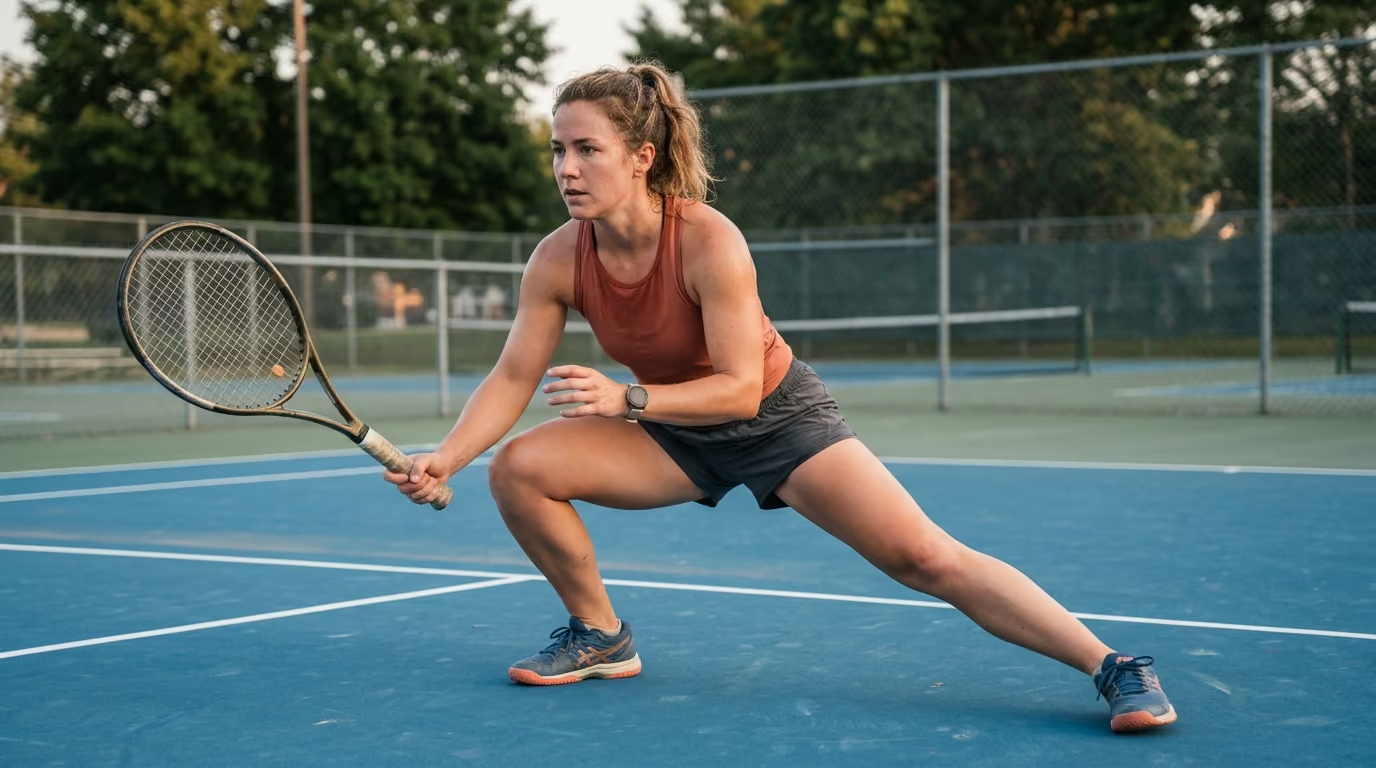

While many believe flexibility is key for racquet sports, usable mobility, which combines range of motion with strength and control, is essential for peak performance.




Mobility in racquet sports is the capacity to actively reach, stabilize, and produce force in sport-relevant positions. It is not merely passive flexibility, which only measures how far a muscle stretches under external pressure. True mobility combines joint range of motion with muscular strength and neurological control to help you move efficiently on the court. To build a foundation for long-term play, players should focus on mobility and movement resources that prioritize active control.
To understand how to move better on the court, you must first distinguish between flexibility and mobility. Flexibility is the passive range of motion around a joint. It is measured when an external force, such as a partner, a strap, or gravity, pulls your limb into a stretch. While passive range is a useful starting point, it does not guarantee that you can use that range during a fast-paced rally.
Usable mobility is your active range of motion. This is the range you can reach, control, and stabilize using only your own muscular effort. In racquet sports, you must repeatedly decelerate your body weight, change direction, and strike a ball. If you have a large passive range of motion but lack the strength to control it, your body may struggle to stabilize itself. This lack of control can lead to inefficient movement or increased stress on your joints.
A helpful way to view this is through the concept of the mobility reserve. Your mobility reserve is the difference between your maximum controlled range of motion and the range of motion required by your sport. If a deep lunge requires ninety percent of your maximum joint range, you are playing at the limit of your capacity. By expanding your active range, you create a buffer. This buffer allows you to handle awkward bounces, late reactions, and sudden slips without overstressing your tissues.
We must also recognize that mobility and stability are not opposites. They are two parts of the same movement sequence. For example, your ankle must bend deeply during a split step while your foot remains stable on the court. Your hip must rotate smoothly as you swing while your pelvis remains organized. Every training plan should help you access a joint range and then immediately teach you how to control that range under load.
Racquet sports place unique physical demands on your body because they involve rapid acceleration, sudden braking, and high-velocity striking. According to tennis injury epidemiology reviews, the lower extremities are the most frequently injured areas, followed by the upper limbs and the trunk. A recent competitive-tennis dataset showed that lower-limb issues made up more than fifty-eight percent of all reported injuries. Within that group, knee injuries accounted for over twenty-three percent, and ankle injuries made up more than seventeen percent of cases.
Badminton also demands extreme ranges of motion, particularly during deep lunging and landing. Systematic reviews of badminton injuries show that the forward lunge is the footwork action most frequently linked to lower-body issues. During a deep lunge, your ankles and knees must tolerate high forces at deep angles. If your joints cannot access these angles comfortably, your body will compensate by shifting the stress to other areas, such as your lower back or patellar tendons.
The upper body has its own unique patterns. In tennis, players often develop asymmetrical adaptations in their dominant shoulder. A meta-analysis of twenty-five studies involving over eighteen thousand tennis players found that players typically have significantly less internal rotation in their dominant shoulder. The dominant side averaged about fifty-three degrees of internal rotation, compared to more than sixty-two degrees on the nondominant side.
These joint-specific findings show that mobility is highly task-specific. You cannot rely on general stretching to prepare your body for the court. Instead, you need a systematic approach that addresses the specific joint demands of your sport. This includes training your joints to absorb impact, transfer force through the kinetic chain, and recover efficiently after every session.
Ankle mobility is your first line of defense when braking, lunging, and reaccelerating. Your ankles must bend deeply to absorb your body weight during a split step or a wide lunge. If your ankles are stiff, your knees and hips cannot contribute fully to force absorption. This can lead to a higher center of mass, slower reaction times, and increased shear stress on your knees.
To build ankle mobility you can use, you must focus on both active dorsiflexion and lateral stability. The following drills are designed to improve your range of motion while building strength in those deep positions.
This drill helps improve ankle dorsiflexion by gently encouraging the knee to slide forward over the toes.
To perform this drill, stand facing a wall with your toes a few inches away. Keep your heel firmly planted on the floor. Slowly drive your knee forward until it touches the wall. If your heel lifts, move your foot slightly closer to the wall.
Perform eight to ten slow repetitions per side. Do not force the end position or allow your foot arch to collapse inward. You can progress this drill by holding a light weight in your hands to add a gentle, active load.
This exercise teaches your muscles to produce force when your ankle is in a deeply bent position.
Assume a split stance with one foot forward and one foot back. Lower your hips until your front knee is bent and pushed forward over your toes. Make sure your front heel remains flat on the floor. Hold this position while actively driving your front foot down into the floor.
Hold this contraction for ten to twenty seconds. Repeat for two to three sets per side. Focus on keeping your torso upright and your front foot stable.
This exercise strengthens the calf muscles and the Achilles tendon through their entire length.
Stand on the edge of a step with your heels hanging off. Hold a light weight in one hand for resistance. Slowly lower your heels below the level of the step until you feel a comfortable stretch in your calves. Pause for one second, then push up onto your toes.
Perform three sets of eight to fifteen repetitions. Use a straight knee to target the gastrocnemius muscle. You can also perform this with a bent knee to target the soleus muscle, which is highly active during court movement.
This drill bridges the gap between isolated mobility and actual court movement.
Step forward into a controlled lunge. As your front foot lands, focus on bending your ankle and knee smoothly to absorb the impact. Pause for one second at the bottom of the lunge to demonstrate control. Push back dynamically to the starting position.
Perform two sets of five to eight repetitions per side. Keep your front knee aligned over your second toe. Do not let your knee cave inward as you land.
Your hips are the powerhouse of your lower body. They allow you to drop into wide defensive stances, rotate your pelvis during a stroke, and recover your position quickly. Because racquet sports require lateral movement, you need excellent internal and external hip rotation.
I remember finishing a tough two hour padel match on a cold Tuesday night and waking up the next morning feeling like my lower back was locked in concrete. For a long time, I just accepted this as the price of playing hard in my forties. But once I started spending just ten minutes on targeted hip mobility before heading to the club, the stiffness almost completely vanished. It taught me that we do not have to accept pain as a default state of aging. In our experience, hip rotation is often the missing link that spares the lower back from excessive twist.
To build usable hip mobility, you must combine active rotation with lateral hip strength. This helps you manage wide steps and deep lateral lunges without placing undue stress on your groin or lower back. Players can consult these strength and conditioning guidelines to integrate these patterns into a broader athletic plan.
This classic drill improves both internal and external hip rotation.
Sit on the floor with your knees bent at ninety degrees. Place one leg in front of you and the other leg behind you, so both legs form a ninety-degree angle. Keep your torso upright and your hands on the floor for support. Slowly rotate your knees to the opposite side without lifting your feet from their spots.
Perform six to eight controlled switches per side. If you want to increase the challenge, try performing the movement without using your hands for support. Keep the movement smooth and avoid any pinching sensations in your hip joints.
This drill combines a deep split stance with active trunk and hip rotation.
Assume a split stance with your left foot forward. Lower your hips until your back knee is just above the floor. Hold this bottom position. Slowly rotate your torso toward your front left leg, then return to the center.
Perform six to eight controlled rotations per side. Keep your front foot flat and do not let your front knee wobble. This teaches your hip stabilizers to manage rotational forces while supporting your body weight.
This exercise targets the adductors, which are highly active during lateral deceleration.
Lie on your side and place your top leg on a bench or a sturdy chair. Support your upper body on your forearm. Lift your hips so your body forms a straight line from your shoulder to your ankle. Hold this position while keeping your bottom leg off the floor.
Begin with short holds of ten to fifteen seconds. Perform two to three sets per side. If this is too difficult, you can shorten the lever by placing your knee on the bench instead of your foot.
This drill builds active flexibility in your groin and inner thigh muscles.
Stand with your feet very wide apart. Shift your weight to your right side as you bend your right knee and sit back into a deep squat. Keep your left leg completely straight with your left toes pointing forward or slightly upward. Use a wall or a sturdy post for balance if needed.
Slowly return to the starting position and repeat on the other side. Perform five to eight repetitions per side. Only go as deep as you can control without letting your heel lift off the floor.
Racquet sports require repeated trunk rotation, flexion, and side-bending. Biomechanical studies show that trunk rotation is a major contributor to racquet head speed. For example, research indicates there is about thirty degrees of separation between the shoulders and pelvis during a one-handed backhand, and about twenty degrees during a two-handed backhand.
However, your spine should not rotate as one single unit. You want to maximize rotation in your thoracic spine, which is your upper and middle back. Your lumbar spine, or lower back, is structurally built for stability rather than rotation. If your thoracic spine is stiff, your body will force your lower back to twist excessively to find that extra range. This pattern can lead to chronic lower back discomfort over time.
To protect your back and maintain a strong transfer of force, you must build thoracic rotation while training your core to resist unwanted movement. These exercises help you separate upper body rotation from lower body stability.
This drill isolates upper back rotation while keeping your lower back stable.
Get down on your hands and knees on the floor. Place one hand behind your head, keeping your elbow wide. Slowly rotate your elbow down toward your supporting arm. Then, reverse the movement and rotate your elbow up toward the ceiling.
Perform six to eight controlled repetitions per side. Keep your hips still and do not let them shift from side to side. Focus on moving only from your rib cage upward.
This exercise trains your trunk to rotate under a light, controlled load.
Attach a resistance band or cable to a post at chest height. Kneel on one knee, with your outside leg forward. Hold the handle with both hands in front of your chest. Slowly rotate your torso away from the anchor point, then return with control.
Perform three sets of eight to twelve repetitions per side. Keep your hips pointing straight forward throughout the movement. This ensures that the rotation occurs in your upper back and not your lower body.
This dynamic drill helps transfer your active rotation range into actual court power.
Stand in a split stance next to a solid wall. Hold a light medicine ball near your back hip. Rotate your trunk and pelvis backward, then throw the ball underhand against the wall. Catch the ball and return to the starting position.
Perform two to three sets of six to eight throws per side. Focus on coordination and smooth movement rather than maximum speed. Stop immediately if you feel your lower back arching or twisting excessively.
This exercise trains your core to resist rotational forces, which is essential for stable braking.
Stand sideways to a cable machine or a resistance band anchor. Hold the handle in both hands close to your chest. Step away from the anchor until you feel tension. Press your arms straight out in front of you, hold for two seconds, and return to your chest.
Perform two to three sets of eight to twelve repetitions per side. Do not let your body twist or lean toward the anchor point as you press. Your torso should remain completely still.
Serving, smashing, and hitting overheads require excellent shoulder mobility. As noted, racquet players often adapt to their sport by losing internal shoulder rotation on their dominant side. While some adaptation is normal, a significant loss of range can alter how your shoulder blade moves. This can lead to issues like impingement or excessive strain on your rotator cuff.
To keep your shoulders healthy, you need a balance of active external rotation, internal rotation, and scapular control. The goal is to reach overhead without arching your lower back or flaring your ribs. These drills help build a strong, mobile shoulder girdle.
This drill improves overhead shoulder flexion and trains the muscles that control your shoulder blades.
Stand with your back flat against a wall. Place your elbows and the back of your hands against the wall at ninety-degree angles. Slowly slide your arms upward, keeping your hands in contact with the wall. At the top of your range, lift your hands and elbows off the wall by a few inches, hold for one second, and return.
Perform eight to ten controlled repetitions. Do not let your lower back arch or your ribs flare as your arms move upward. If you cannot keep your hands on the wall, start with a slightly wider arm position.
This pressing variation is highly effective because it allows your shoulder blade to rotate naturally.
Kneel on one knee, holding the end of a barbell or a resistance band in the opposite hand. Start with the hand close to your shoulder. Press the weight upward and forward at a slight angle, allowing your shoulder blade to wrap around your rib cage. Return to the starting position with control.
Perform three sets of eight to twelve repetitions per side. Keep your torso upright and avoid leaning to either side. This press is often more comfortable than a strict overhead press for players with shoulder sensitivity.
This exercise targets the posterior rotator cuff, which decelerates your arm after a strike.
Stand sideways to a cable machine with the pulley set at shoulder height. Hold the handle in your outside hand, with your elbow bent at ninety degrees and your upper arm parallel to the floor. Slowly rotate your forearm upward and backward, then return to the start.
Perform two to three sets of eight to fifteen repetitions per side. Use a very light weight and focus on a slow eccentric, or lowering, phase. Keep your shoulder blade stable throughout the movement.
This exercise builds reflexive shoulder stability and grip strength at the same time.
Hold a light kettlebell upside down by the handle. Your elbow should be bent at ninety degrees, with the weight balanced directly over your hand. Walk slowly for a short distance while keeping the kettlebell completely stable.
Walk for thirty to fifty feet per side. Perform two to three sets. Keep your wrist straight and your shoulder active. If the kettlebell starts to wobble, stop and reset.
Your wrists and forearms are the final link in the kinetic chain. They must absorb the impact of the ball, manage racquet vibration, and control the angle of your shots. If your wrists are weak or stiff, you may experience issues like lateral epicondylalgia, commonly known as tennis elbow.
A recent review indicated that personalizing your racquet grip size can help reduce lateral epicondylalgia. However, you also need to build active strength and resilience in your forearm muscles. These drills combine range of motion with progressive load to help protect your wrists.
This drill improves passive and active wrist extension, which is useful for supporting the racquet.
Get down on your hands and knees with your fingers pointing forward. Keeping your elbows straight and your palms flat, slowly rock your weight forward over your hands. Pause for a second at the point of mild stretch, then rock back.
Perform ten to twelve controlled repetitions. You can rotate your hands so your fingers point outward or toward your knees to stretch different forearm muscles. Only move through a comfortable range of motion.
Isometrics are excellent for building tendon resilience and reducing local discomfort.
Rest your forearm on a flat bench or table with your palm facing down. Your hand should hang slightly over the edge. Hold a light dumbbell. Lift your wrist slightly into extension and hold this position without moving.
Hold this static position for thirty to forty-five seconds. Repeat for two to three sets. Choose a weight that is challenging but does not cause any sharp discomfort.
This exercise strengthens the muscles that rotate your forearm, which is vital for spin and control.
Sit with your forearm supported on your thigh or a table. Hold a light hammer or a dumbbell by the end of the shaft. Slowly rotate your forearm until your palm faces up, then rotate it back until your palm faces down.
Perform two to three sets of ten to fifteen slow repetitions. Do not use momentum to swing the weight. The longer the shaft of the hammer, the more challenging the exercise will be.
Eccentric training is highly effective for building strength and managing overuse issues in the forearm tendons.
Rest your forearm on a table with your palm facing down. Use your opposite hand to help lift the dumbbell up into wrist extension. Remove the helping hand, then lower the weight as slowly as possible over a count of four seconds.
Perform three sets of ten to twelve repetitions for both extension and flexion. Focus on the slow lowering phase. This method helps build tissue tolerance under controlled conditions.
To get the most out of your mobility work, you should organize your training into a three-layer model. This model ensures you are preparing your joints before you play, building strength in those ranges during off-court sessions, and supporting recovery afterward. By following structured injury prevention principles, players can maintain consistency without overworking their tissues.
Your pre-session warm-up should raise your core body temperature and prepare your joints for fast movement. Research shows that dynamic warm-ups can improve sprint, jump, and agility performance. Static stretching alone can increase range of motion temporarily, but long passive holds immediately before explosive play can decrease muscle power.
Keep your warm-up to ten or fifteen minutes. Start with light movement, progress to joint mobilization, and finish with active control exercises. This prepares your nervous system for the specific angles you will reach on the court.
This is where you make lasting structural changes to your joint capacity. You do not need to separate your mobility training from your strength training. In fact, systematic reviews show that resistance training through a full range of motion is just as effective as stretching for improving flexibility.
Incorporate exercises like full-range split squats, lateral lunges, and controlled rotations into your weekly routine. This teaches your nervous system that you are strong and stable in these deep positions. Over time, your brain will allow you to access these ranges more easily during match play.
The final step is teaching your body to use its mobility under the chaotic conditions of a match. This involves practicing footwork patterns, deceleration stops, and recovery steps.
Start with predictable, low-speed shadow swings. Gradually increase the speed and introduce reactive elements, such as responding to a partner’s feed. This ensures your active range of motion is available when you need to react quickly to a ball.
While all racquet sports share some common movement patterns, each game has its own unique physical demands. Understanding these differences helps you tailor your mobility work to your specific sport. For example, readers can check out our dedicated padel articles or browse through our pickleball articles to see how court dimensions change movement strategies.
Tennis is played on a large court, which requires players to cover long distances at high speeds. This means you must tolerate large deceleration forces. You will frequently find yourself in deep, wide lunges on the baseline.
Because of this, tennis players need exceptional ankle dorsiflexion and lateral hip strength. The serving motion also requires significant thoracic extension and shoulder external rotation. If you play tennis, you should prioritize building tissue resilience in your calves, adductors, and rotator cuff to manage these high-velocity demands.
Pickleball is played on a smaller court, which reduces the need for long sprints. However, the game is played with a low-bouncing ball. This requires you to stay in a squatted, ready stance for long periods, especially during kitchen rallies.
For pickleball players, hip flexion and thoracic rotation are critical. If your hips are stiff, you will bend from your lower back to reach low balls, which can lead to fatigue and discomfort. You also need excellent wrist stability to handle quick, reflex volleys at the net.
Padel combines elements of tennis and squash. The presence of the glass walls means you must constantly turn, pivot, and adjust your body to rebound balls. The game also features a high number of overhead shots, such as the tray and the smash.
Padel players need superb hip internal and external rotation to turn quickly in tight spaces. You also need exceptional shoulder mobility and scapular control to handle the high volume of overhead striking. Prioritize thoracic rotation and shoulder stability to keep your body moving smoothly on the padel court.
When trying to improve their movement, players often fall into a few common traps. Recognizing these mistakes can save you time and help you avoid unnecessary discomfort on the court. To learn more about common physical errors, you can explore our collection of player health articles.
Many players believe that the goal of mobility training is to become as flexible as possible. They spend hours performing passive stretches to increase their range of motion. However, if you cannot control a range actively, your brain will perceive that position as unsafe. On the court, your body may tighten up or compensate to avoid entering that uncontrolled space. Always pair your mobility drills with active isometrics or light loads to teach your body how to stabilize the new range.
No amount of mobility work can protect you from sudden spikes in your training volume. Research shows that abrupt increases in your acute-to-chronic workload ratio are strong predictors of injury. If you double your playing hours over a single weekend, your tissues may become sensitized, regardless of how mobile you are. Use a gradual ramp-up strategy after taking a break from the court, and do not use your flexibility as a reason to ignore rest days.
Some players believe that a mobility drill must feel intense or slightly painful to be effective. However, aggressive stretching can irritate your nerves and tendons, leading to protective muscle guarding. You should only feel a gentle, tolerable stretch sensation during your drills. If you experience sharp pain, pinching, catching, or numbness, stop the exercise immediately.
Incorporating a dedicated mobility routine can have a positive impact on how your body recovers between sessions. When you move your joints through their full range of motion, you promote better circulation and joint lubrication. This helps reduce the sensation of stiffness that often develops the morning after a demanding match.
Additionally, performing low-intensity mobility work after a session can help shift your nervous system into a relaxed state. Slow breathing, gentle hip rotations, and light calf stretches help signal to your body that the work is done. This can lower muscle tension and support better sleep quality, which is the cornerstone of athletic longevity.
Over time, consistent active mobility training helps maintain the health of your connective tissues. Muscles and tendons adapt to the loads we place on them. By exposing them to controlled, full-range movements, you help keep these tissues elastic and resilient, ensuring you can continue playing the sports you love for years to come.
While active mobility training is highly beneficial, it is not a cure for structural injuries or acute pain. You should always listen to your body and recognize when a symptom requires professional evaluation. Consulting a qualified physical therapist, sports physician, or orthopedist can ensure you receive an accurate diagnosis and a safe path forward.
You should seek professional medical advice if you experience any of the following warning signs:
Working with a healthcare provider allows you to rule out serious issues and tailor your program to your exact structural needs. This is especially important if you are returning to the court after an extended layoff or a past injury.
For many players, yes. Research indicates that resistance training through a full, controlled range of motion can improve flexibility just as effectively as traditional stretching. Exercises like full-range split squats, lunges, and rows help you build strength and active range of motion at the same time. However, if you have specific joint restrictions, incorporating targeted active mobility drills alongside your strength training is often the most effective approach.
Consistency is more important than duration. Performing a ten-minute dynamic mobility routine before every match or practice session is highly effective. For long-term improvements in joint range, try to incorporate a twenty to thirty-minute dedicated strength and mobility session two to three times per week. This provides enough stimulus for your muscles and nervous system to adapt.
Some side-to-side differences are normal adaptations to racquet sports, especially in your dominant shoulder or hip. You do not need to chase perfect symmetry. However, if the asymmetry is accompanied by pain, weakness, or a significant loss of function, it deserves attention. Focus on performing single-leg or single-arm drills to ensure you are building control and strength on both sides of your body.
Follow Evercourts for practical insights on tennis, pickleball and padel performance, movement, recovery and healthy ageing. Stay connected for new articles, research-led guidance and ideas to help you play well and keep playing for years.


Read practical guidance for better movement, smarter preparation and a game that keeps working for you.
explore the Blog



