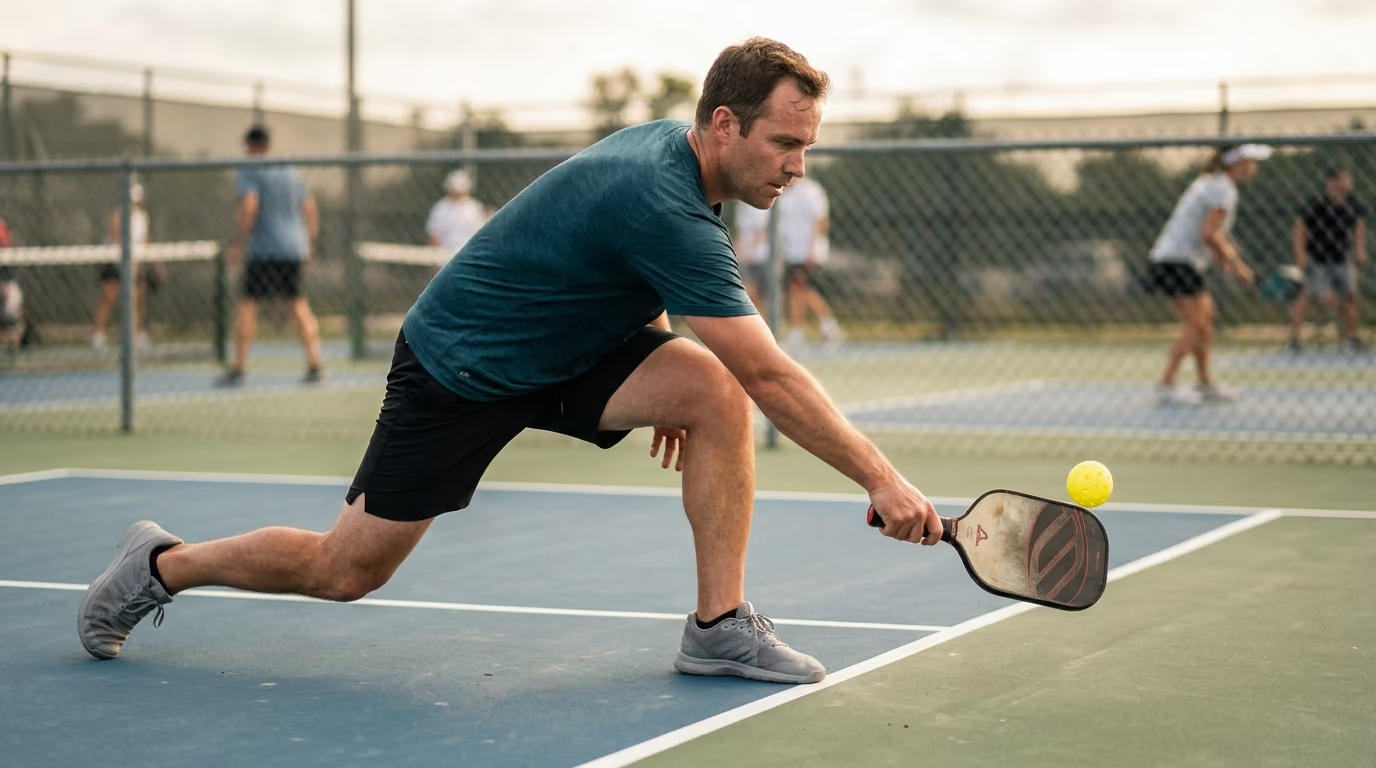

When a sudden dink sends the ball spinning toward the sideline, safe movement in pickleball and padel requires specific techniques to protect your joints.




You are locked in a fast volley exchange near the pickleball kitchen line. A sudden, sharp dink catches you off guard, sending the ball spinning toward the outer sideline. You lunged blindly, reaching with your racket hand while your trailing foot remained stuck behind you. Your shot cleared the net, but your knee twisted, and you spent the next three points trying to regain your balance.
Many court athletes face this exact scenario every week. The fast, tight nature of modern racket sports demands sudden changes in direction. Moving safely under pressure is a skill you can train, rather than a matter of luck.
Safe movement on the court relies on maintaining a manageable relationship between your center of mass and your base of support. By prioritizing short adjustment steps, controlled trunk positioning, and active braking over extreme stretching, you can navigate tight court spaces without overloading your lower joints. This systematic approach ensures you can play the shot while retaining the balance needed for your next recovery step.
Pickleball and padel differ significantly from tennis in terms of court space and environmental constraints. These tight spaces change how you must decelerate, reach, and recover. To move safely, you must understand how court dimensions dictate your physical mechanics.
A standard pickleball court is 20 feet wide by 44 feet long. The non-volley zone, commonly known as the kitchen, extends 7 feet from the net on each side. According to the USA Pickleball Official Rulebook, players are prohibited from volleying a ball while touching this zone or its boundary line.
This rule creates a unique physical challenge. You must often rush forward to reach a drop shot, but you must stop your momentum completely before touching the line. This sudden braking forces high eccentric loads on your quadriceps, knees, and ankles. If you run too fast, you are forced to make emergency lunges or unstable backpedals. Utilizing resources like comprehensive pickleball articles can help you understand these specific tactical and physical demands.
A regulation padel court is 10 meters wide by 20 meters long. It is enclosed by glass walls and wire fencing, which completely changes your movement path. Instead of running through a ball as you would in tennis, you must negotiate rebounds, corners, and your partner's positioning.
The presence of the walls means you often cannot take a long, linear path to the ball. You must run toward the wall, decelerate in a confined space, and turn your body to play the ball after it bounces off the glass. If you lunge too early or too far, you risk colliding with the wall or getting stuck in a position where you cannot swing. Reviewing padel-specific movement guides can assist in mastering these wall-based transitions.
Tennis courts provide a much larger run-off area, allowing players to slide or decelerate over a longer distance. In pickleball and padel, the playing space is highly compressed. You must stop almost instantly, change direction in a single step, and manage your partner's physical presence. This makes space management a critical component of injury prevention.
To move safer, we must look at where injuries actually occur. The data shows clear differences in how pickleball and padel affect the body.
A 2025 analysis of U.S. emergency-department data identified 749 pickleball upper- and lower-extremity injury cases from 2003 through 2022. This study included 286 adults and 430 geriatric patients. The data showed that pickleball extremity injuries increased by 3,650% from 2012 to 2022, reflecting the sport's rapid growth.
Adults in this study had a much higher proportion of lower-extremity injuries than pediatric or geriatric patients. Lower-extremity injuries represented 59.4% of adult injuries, compared with only 36.4% in children and 39.8% in older patients.
A separate National Electronic Injury Surveillance System analysis covering 2014 through 2023 identified 1,722 unique cases. This represented an estimated 100,704 pickleball-related injuries presenting to U.S. emergency departments.
Another 10-year epidemiological study from 2012 through 2022 identified 1,264 emergency-department visits. Of these, 68.6% were classified as orthopedic injuries. The average age of injured patients was 67 years. Fractures, sprains, and strains were highly common, particularly in the lower trunk, lower leg, and knee.
A 2024 review reported that the most common emergency injuries were muscle strains, joint sprains, and fractures. The study also highlighted a sex difference in these patterns. Men were three times more likely to sustain muscle strains and joint sprains, while women were three times more likely to sustain fractures.
Additionally, a 2025 South Korean cross-sectional study reported that 34.2% of participants had experienced an injury during the previous 12 months. Among the lower-extremity injuries, the knee accounted for 23.3% and the ankle or foot accounted for 13.8%.
The injury landscape in padel shows a different distribution of risk. A 2024 scoping review of padel injuries found that the elbow was the most frequently reported injury location. This was followed by the shoulder and low back, while the knee was the most affected lower-extremity region.
Across the literature, tendon, joint, and muscle structures were the most common tissue categories injured. A comprehensive review of padel injury incidence reported approximately 3 injuries per 1,000 hours of padel training. This number rose to 8 injuries per 1,000 hours during actual matches.
The overall injury prevalence estimates ranged from 40% to 95% across various studies. A systematic review comparing padel, tennis, and squash reported high prevalence values of 85.4% in the padel literature. Padel injuries were most often tendon- or muscle-related, with the elbow remaining the dominant anatomical site.
Emergency-department studies show severe, acute injuries, but they do not capture the minor strains or persistent aches that players manage at home. The evidence does not prove that a single lunge technique causes a specific injury.
Instead, it tells us that lower-limb injuries, falls, knee issues, and ankle sprains are critical targets in pickleball. For padel players, prevention must address the lower limbs while also protecting the elbow, shoulder, and back.
To build a reliable movement pattern, you must balance six interacting variables. When you manage these elements, you reduce stress on your joints and keep your movement efficient.
Your position relative to the ball, the net, and the boundaries determines your movement choices. If you are close to the ball, you only need a small adjustment step. If you are out of position, you may need a deeper lunge or a pivot. Understanding your physical coordinates helps you avoid unnecessary emergency reaches.
How fast you are moving determines how hard your muscles must work to stop you. Arriving at the ball with too much speed makes it difficult to stabilize your front leg. A useful coaching cue is to brake before you reach. You must slow down your forward progress before you plant your foot to strike.
Your support foot must accept your body weight securely. It should point generally in the direction of your movement to keep your knee aligned. If your foot points one way and your hips turn another, you place high rotational stress on your knee joint. Prioritize a stable, recoverable foot plant over trying to reach as far as possible.
Your trunk controls your center of mass. A review of anterior cruciate ligament injury mechanisms found that limited trunk bending and excessive side-bending toward the stance leg were linked to higher knee loading.
This does not mean you must keep your back perfectly upright. A controlled hinge at your hips helps lower your center of mass over your feet. The key is to avoid uncontrolled folding, twisting, or collapsing at the waist.
You do not need to follow rigid rules about your knee never passing your toes. Instead, focus on loading your leg dynamically.
The foot must accept your weight without slipping. Your knee and hip should share the job of braking, and your knee should not collapse inward.
A 2025 lunge study showed that lower-limb movement patterns differ between forehand and backhand forward lunges. Backhand lunges can place greater rotational demands on the ankle. This shows why we must train direction-specific movements rather than assuming one lunge fits every shot.
A lunge is not finished when you hit the ball. The movement is only successful if you can transition immediately into your next step. Your final foot plant must preserve enough muscle tension to let you push back toward the center of the court.
Your trunk acts as the anchor for your limbs. When your trunk is stable, your racket arm can move freely without pulling your entire body out of balance.
When reaching for a low ball, many players bend entirely from the waist, rounding their spine. This shifts their weight too far forward, making recovery slow and placing high stress on the lower back.
Instead, use a hip hinge. Push your hips back slightly as you lower your body, keeping your spine relatively straight. This engages your glutes and hamstrings, which are much larger and stronger than your lower back muscles.
To generate power or reach a wide ball, your body must rotate. This rotation should happen through your thoracic spine (upper back) and your hips.
If your foot is glued to the court and your knee twists to accommodate your swing, you risk injuring the joint. Allow your back heel to lift or your feet to pivot slightly so your hips can turn naturally. This simple adjustment protects your knees from absorbing excessive rotational force.
Your head weighs a significant amount, and where it goes, your center of mass follows. If you throw your head forward or sideways to reach a ball, your balance will collapse. Try to keep your head relatively stable and upright during your final approach. This keeps your vision steady and makes it easier to track the ball.
How and where you plant your feet determines your stability. Apply these basic principles to keep your movement predictable and safe.
Many players believe that standing on a balance board is enough to prevent injuries. However, the sports science literature shows that balance training alone is not a complete solution.
A systematic review of sports injuries reported that multi-intervention neuromuscular training reduced lower-limb injury risk by approximately 39%. It also reduced acute knee injury risk by 54% and ankle-sprain risk by 50%.
A separate meta-analysis supported these findings, showing a significant reduction in lower-limb injuries among athletes who used comprehensive neuromuscular programs.
An earlier review compared different types of training. It found that balance training on its own significantly reduced ankle-sprain risk, but did not show a statistically significant reduction in overall lower-limb injuries. To protect your joints, your training must combine balance work with strength, agility, landing mechanics, and cutting drills.
A 2025 systematic review of young athletes found a 27% reduction in lower-limb injury risk with consistent neuromuscular training. The most effective programs lasted 20 to 30 minutes per session, performed one to two times weekly for more than six months.
While recreational adult players have different schedules and physical demands, this data highlights a key lesson: consistency over time is what builds physical resilience and athletic longevity. Investing in injury prevention resources can help you construct a highly sustainable routine.
For a broader look at designing your overall training schedule, explore our curated movement resources on the main Evercourts platform.
To build reliable movement patterns, you should follow a progressive training model. Do not jump straight into high-speed reactive drills. Start with basic control and gradually add complexity.
Before you move fast, you must master slow movement. Practice these exercises at home or on an empty court to build basic joint control.
Once you have static control, introduce basic footwork patterns. Perform these movements without a ball or racket, focusing entirely on clean foot placement.
Now, add your racket and a predictable ball feed. This stage connects your footwork with your actual hitting mechanics.
Racket sports are unpredictable. To protect your joints, you must train your brain to make fast, safe decisions under movement pressure.
Fatigue makes your movement less reliable. This stage trains your body to maintain clean mechanics even when your muscles are tired.
Finally, apply your training to the exact scenarios you face in pickleball and padel matches.
To help visualize these movement concepts, let us look at five common scenarios where players often struggle, along with the physical corrections needed to stay safe.
The player is positioned close to the kitchen line. A sudden, angled dink goes toward the sideline, and the player reaches out with their racket while keeping their outside foot glued behind them.
The player sees a ball traveling toward the back corner and lunges forward immediately, trying to strike it before it hits the glass.
The player lunges deep on their backhand side, planting their lead foot turned completely away from the direction they want to recover.
The player sprints forward to reach a short drop shot and attempts to stop with their back completely vertical and their knees locked straight.
The player runs hard, reaches far, and hits an incredible winning shot, but immediately falls to the court or collides with their partner.
Many classic coaching cues and fitness myths can actually lead to poor movement habits. Let us clarify these common misconceptions.
Many fitness trainers tell players to get as low as possible during a lunge. While a deep lunge builds strength in the gym, excessive depth on the court can leave you stuck.
If you lunge too deep under pressure, your muscles must work incredibly hard to lift you back up. Keep your lunges to a moderate depth so you can push off and recover quickly.
This old rule is too simplistic for the dynamic nature of racket sports. When you decelerate quickly, your knee will naturally travel forward over your toes to help absorb your momentum.
This is safe as long as your heel stays planted on the floor and your knee does not collapse inward. Focus on joint control and comfort rather than rigid structural rules.
Trying to keep your back completely vertical while lunging makes it very hard to lower your center of mass. A moderate forward lean is natural and helps distribute your weight through your hips and glutes. The goal is controlled bending at the hips, not holding your spine completely rigid.
Your racket can reach a long way, but your arm should not work in isolation. If you reach your arm far away while your upper body continues moving in the opposite direction, you place high stress on your shoulder and spine. Move your feet closer to the ball first, then use a controlled, modest arm reach to make contact.
Every time you stop, plant your foot, or change direction, your muscles absorb eccentric loads. Understanding how these forces affect your tissues can help you manage your recovery and maintain your athletic longevity.
Deceleration is an eccentric movement, meaning your muscles are lengthening while under tension. This type of work causes microscopic tears in your muscle fibers, which is what leads to delayed onset muscle soreness.
If you play several days in a row without allowing these tissues to repair, your muscles will be less effective at absorbing impact. This shifts the stress onto your tendons and joints, increasing your risk of chronic issues like tendinitis or joint pain.
As your leg muscles tire during a long match, your body will automatically look for easier ways to move. You might start landing with a stiffer leg, folding more from your waist, or letting your knee collapse inward.
These subtle changes in your movement patterns are often hard to notice, but they significantly increase the load on your joints. If you feel your coordination slipping, adjust your tactics. Play a higher, defensive ball to give yourself more time, or take an extra step instead of trying to make a heroic, deep lunge.
To prepare your joints for the high demands of lunging and reaching, your warm-up should match the movements you will perform on the court. Static stretching before a match can temporarily reduce your muscles' ability to produce power and absorb sudden forces.
Instead, use a dynamic warm-up. Spend five to ten minutes performing light jogging, side shuffles, leg swings, and gentle, progressive lunges. This increases blood flow to your muscles, prepares your nervous system, and improves your overall joint mobility.
While practicing these movement skills can improve your performance and comfort, it is not a substitute for professional medical care. You should consult a qualified healthcare provider, such as a physiotherapist or sports physician, if you experience any of the following signs:
If you are recovering from a previous injury or manage chronic joint instability, do not attempt deep lunges or high-speed pivots on your own. A medical professional can design a personalized rehabilitation and loading program tailored to your specific physical needs.
Revisit this guide before starting a new season, when returning from a break, or if you notice you are finishing matches with sore knees and lower back stiffness. Adjusting your movement patterns is a gradual process that requires consistent, mindful practice.
By focusing on controlled trunk mechanics, smart foot placement, and realistic decision-making, you can protect your joints and keep playing the sports you love for years to come.
Follow Evercourts for practical insights on tennis, pickleball and padel performance, movement, recovery and healthy ageing. Stay connected for new articles, research-led guidance and ideas to help you play well and keep playing for years.


Read practical guidance for better movement, smarter preparation and a game that keeps working for you.
explore the Blog



